![]()
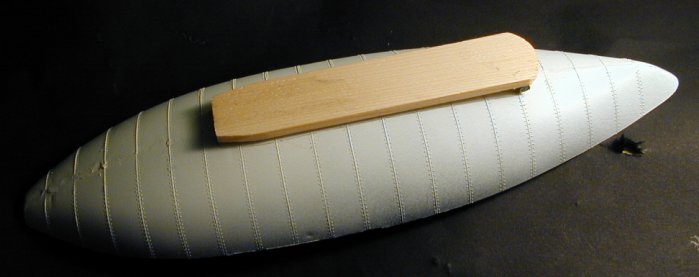
With the basic hull complete, the question is how to proceed. I thought a conventional
deck onto which I could place sailor figures was in order. To that end I cannibalized a
small wooden model ship model sold in craft store. The model in question was of a modern
cruise ship. This featured multiple cabin decks, each made by a nicely formed plant of
soft pine, each of slightly different size. I simply tried each for size picking one
I thought would work. In retrospect, I would have picked a larger plate.
The deck plate was centered and secured to the hull with PVA glue. A small jack made
from a length of plastic runner (sprue) was used level the deck and support the front
end.
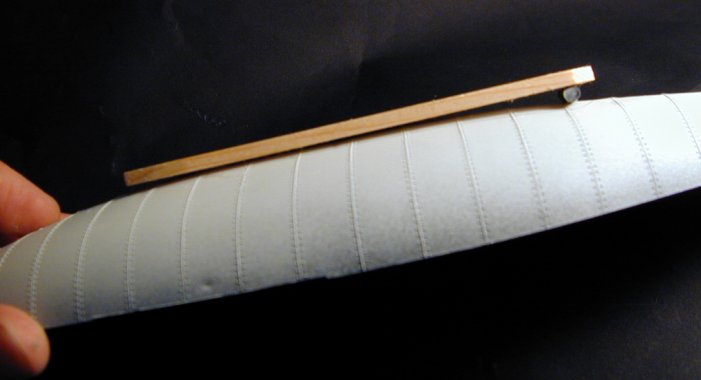
As the underside of the deck will be hidden from view in the finished model any sort of
trash can be used for this. Care must be taken to level the deck with the implied waterline
of the model. Remember to level front to back as well as side to side.
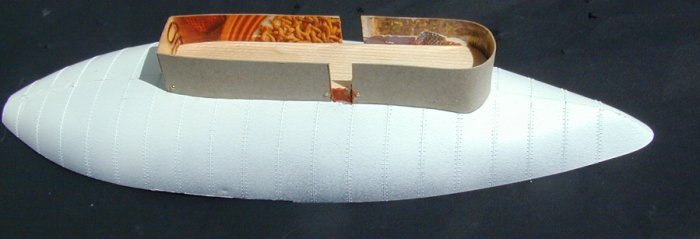
To model a steal bulwark, I wrapped the deck with thin card saved from a cereal box. I used a
compass (the kind for drawing circles) to determine the contour fit of the card to the hull top.
This was done by setting point and pencil of the compass close together an holding the compass
horizontally and tracing along hull card junction drawing the contour onto the card with the
pencil of the compass. This trace mark can then be cut. Much checking and some sanding of
the card will give you a good fit.

Once satisfied with the fit, I glued the card to the wood of the deck with PVA and pressed
small pins through the card at critical point to help hold everything in place.
The pins could have been removed after the glue had dried, but I thought the y looked fine
in place. I left a small gap on each side of the ship to allow for a gangway. I retrospect
I would made a complete bulwark and cut the ways latter. As it is I tried to fill the
space under the deck with some body putty.
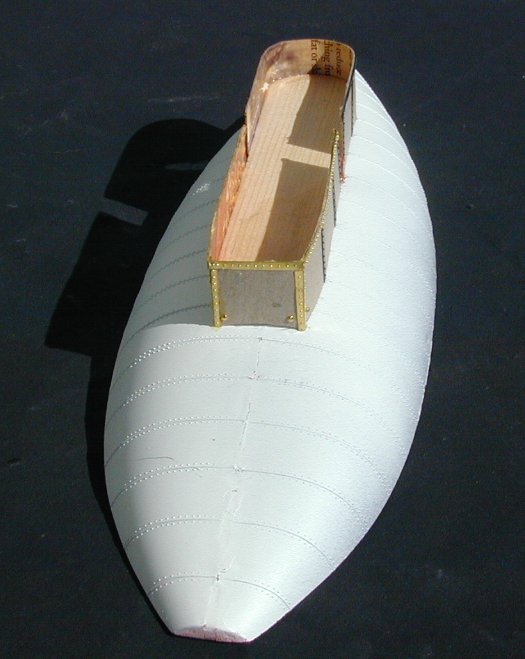
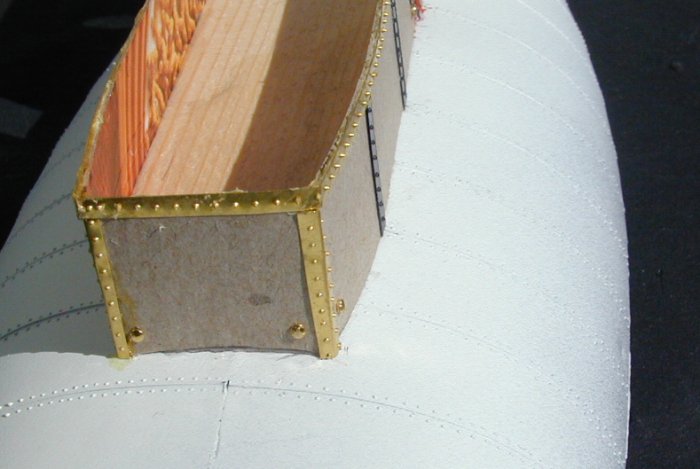
To enhance the "Victorian effect", I added banding with rivets. To review the making
of the banding you can visit the Rivet page.
I used two materials for the banding, brass and X-ray film. The brass holds the rivet
impression very well and can be preformed with sharp bends, as on the corners of the rear
corners of the bulwark. The downside of brass is it tends to coil under the process
of impressing the rivets and requires a more aggressive glue to hold in place. I used
contact cement to secure the brass to the card, and it appears to be holding well.
The X-ray film can be glues with PVA and stays nice a flat after the impressing the rivet
marks. The downside here is that the film does not bend well or hold the bend as well
as brass and the rivet heads often pop off leaving a small hole. It application this was not
too great of a set back as the PVA will fill the missing rivet head and still imparts
the over all impression of the row of rivets fairly well.
This close-up view of the rear of the bulwark, shows the brass as preformed, and a few
smug marks from the contact cement. The dark blue bands on the sides are formed from
X-ray film.
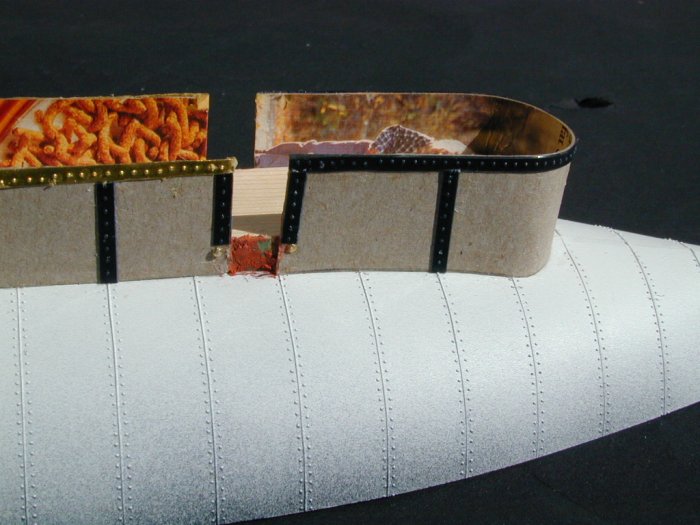
This side view shows the X-ray film more clearly. Also my first attempt to fill
the gap under the deck. Here the pin heads turned out to be quite a headache, as
they prevented me from properly smoothing the putty. Note also my attempts to match
the vertical banding with the rib rivets of the main hull.
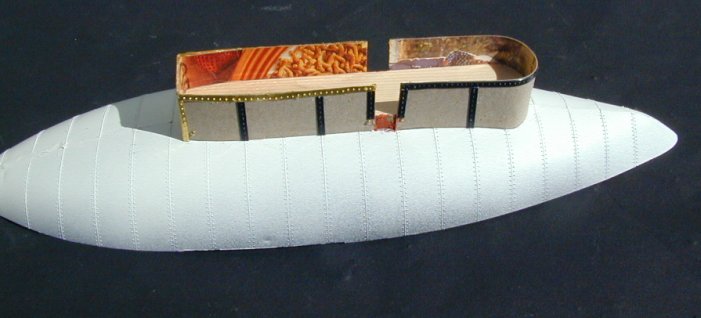
With the basic deck and bulwark complete, it is time to consider the deck house and other
features on the top of the ship. This is when it became clear that the deck was really
too small. To allow some space for crew figures I would need to limit any deck to
structures.
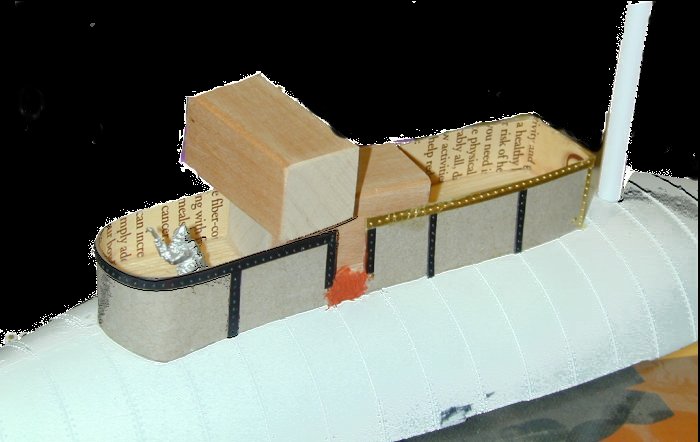
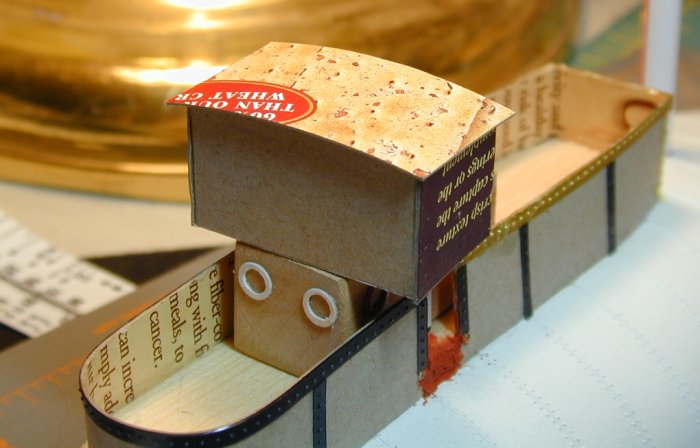
In this rather doctored photo one can see some experiments with small wooded blocks.
My intention was to build a deck house with a second story pilot house. As the deck was
so narrow, the deck house would have to be very narrow, but I envisioned a wider pilot
house above, over hanging the bulwarks. One can also see the smoke stack added to
the rear of the hull. The stack is made from a plastic drinking straw. A properly sized
hole was drilled through the plastic of the hull and supported underneath with some plastic
sprue. I originally intended to have a much larger diameter stack in the center of the
vessel, but thought this would consume too much of the limited deck space.
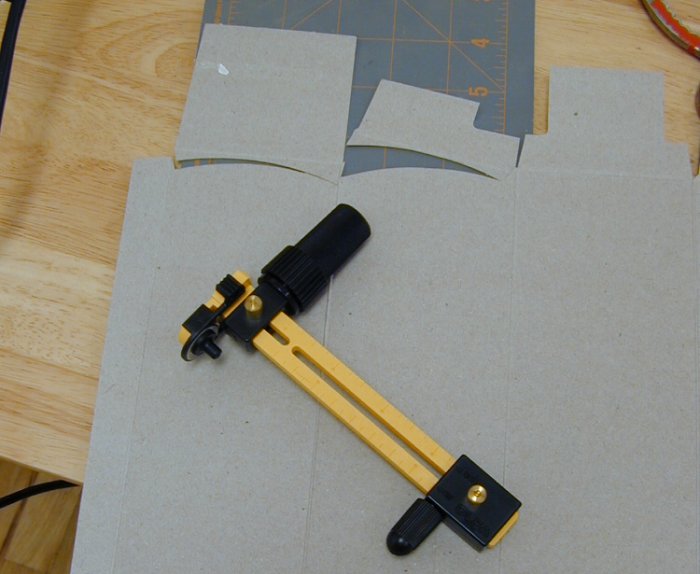
To give the pilot house a more realistic profile, I planed on cladding it in thin card with
a slightly curved roof line. I used this nifty circle cutter set at a very large radius to
cut some arcs out of thin card.
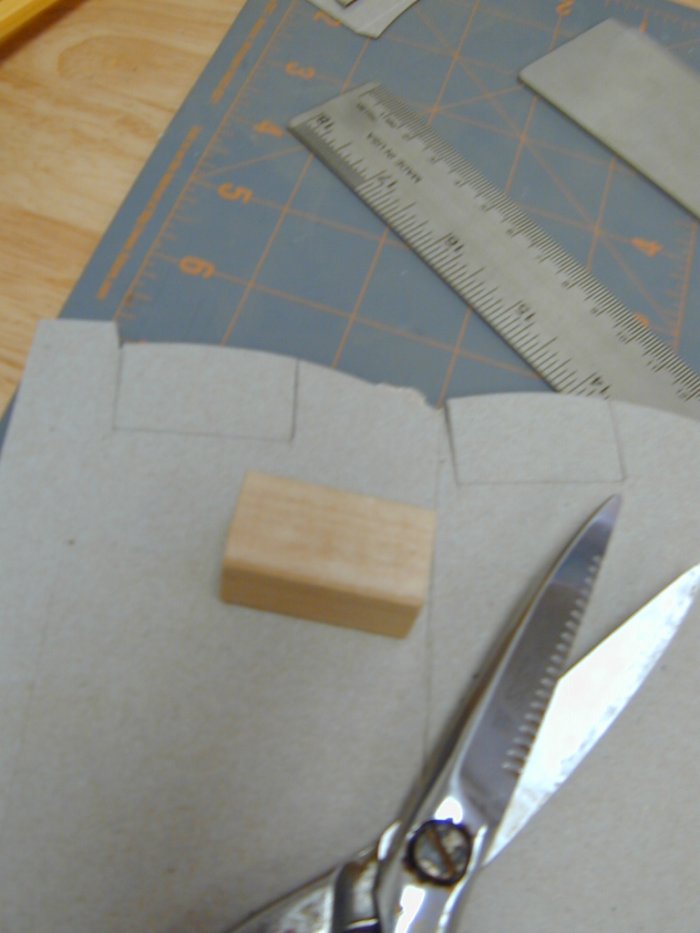
Now using the wooden block as a template I trace out the pilot house front and rear sides.
The front and rear plates are glued to the wooden block. One could build these parts simply
out of card, but I find the players tend to grab and squeeze these structures in the heat
of battle. Having a solid block under the surface will extended model life.
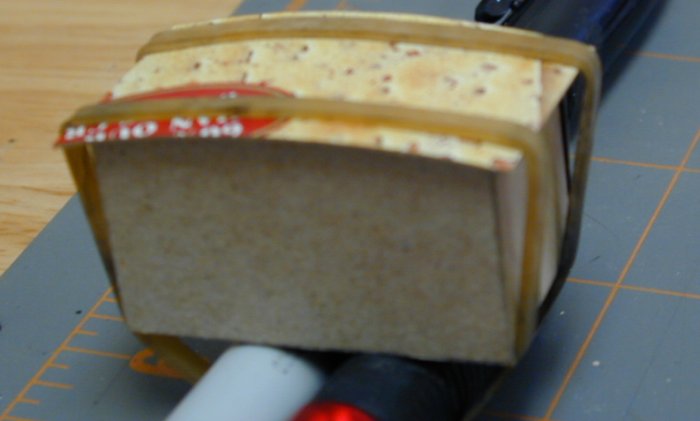
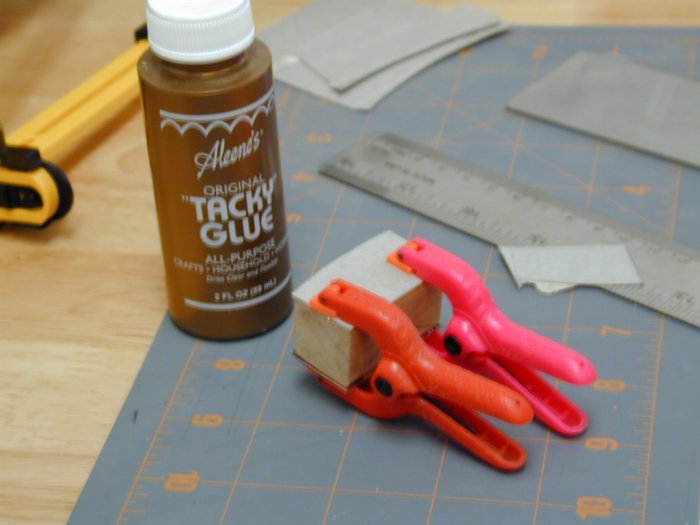
The roof is secured to the subassembly. Rubber bands provide the pressure while the glue cures.
Leaving a slight overhang on all sides of the roof help provide the proper illusion and
makes gluing ever so much easier.
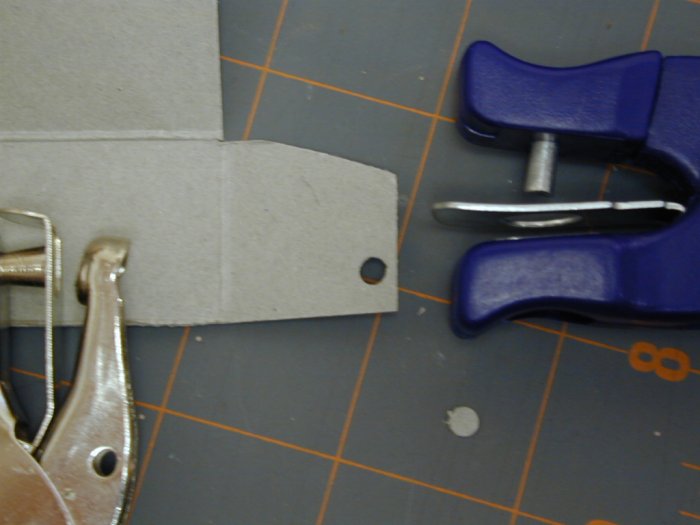
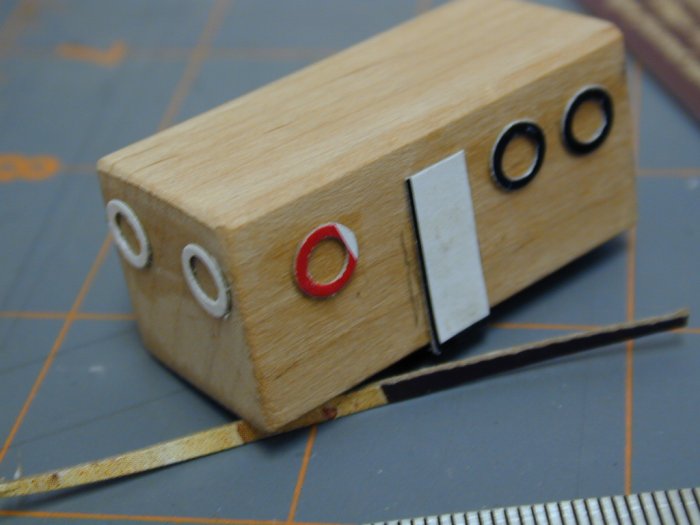
To make traditional porthole windows I use round paper punches. The can be obtained from
craft stores with a variety of shapes and sized holes. Remember it is sometimes the hole
you want and sometime it is punched out part. In this case it is a combination of both.
First punch a small hole through so very thin card.
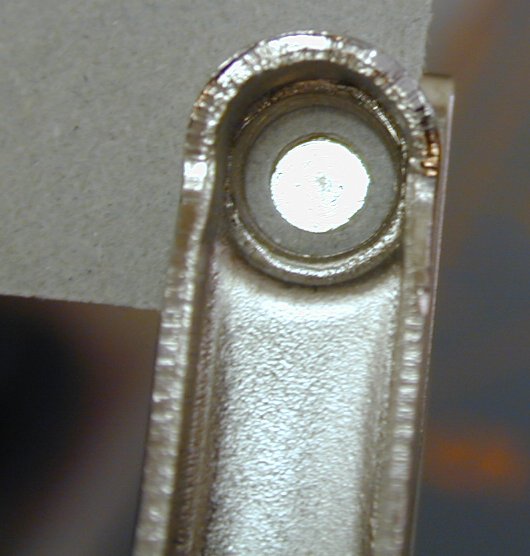
Now with a slightly larger punch, center the small hole within the larger punch.
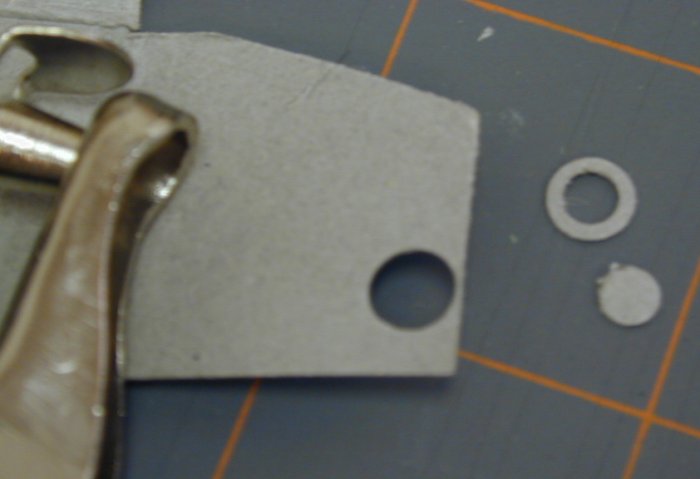
This may take some practice, but a the raw material is so cheep one can punch out many
attempts and sort through for the better examples.
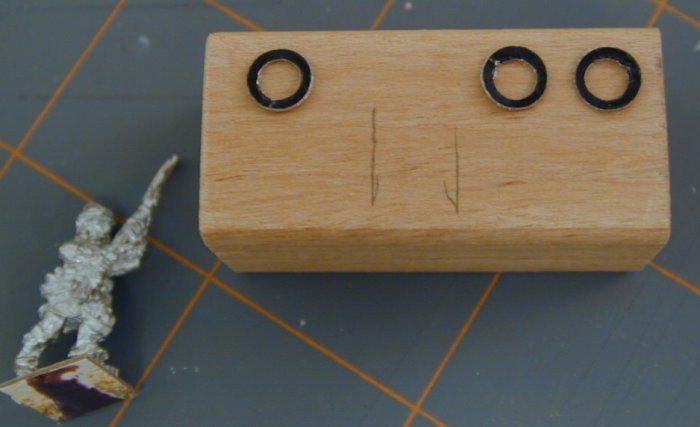
One can then experiment with the placement of portholes on the deckhouse. For this
structure I decided not to clad it in card as that would increase its girth and consume
even more deck space. I planned for doors to align with the gangways, as drawn in with
pencil on the block. Remember that the illusion of the house is to contain people, so
a figure can be used as a reference on door size and window height.
Here is the mockup of the deckhouse. I also rounded the corners slightly and sanded
a very slight curve to the roof.
With the subassemblies at hand I now experiment with proper placement of the deckhouse
and the pilothouse. Here we see the fronts of the two structures flush.

Here I experiment with the pilothouse overhanging the front of deckhouse. This
is a more typical arrangement for more modern ships.
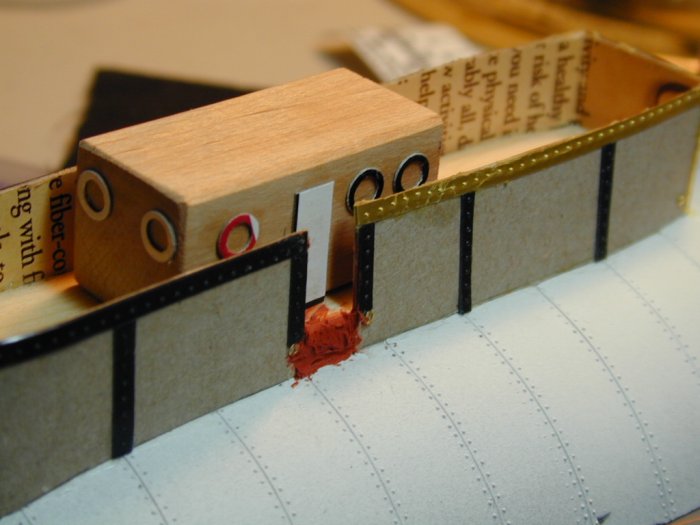
In the end, I concluded that the pilothouse was just too bulky for the rather small vessel.
The deckhouse alone reminds me of a WWII PT boat or other fast petrol ship. It alone
give the deck a less crowded look.
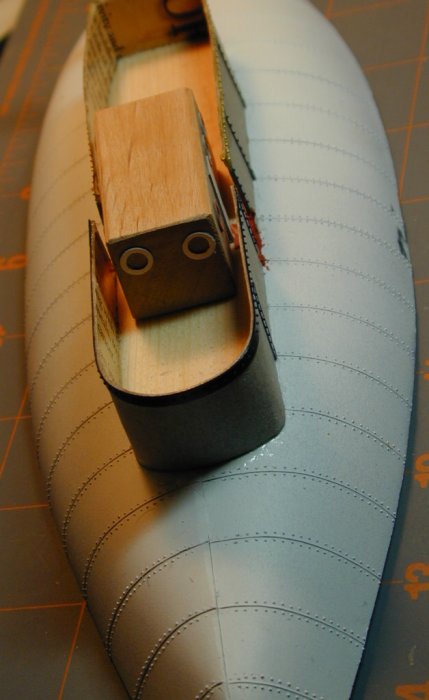
From this view it can be see how narrow the passages ways along the sides of the deckhouse
really is. Even though no figure could be squeezed into such a tight spot, the overall
effect is not too bad. Remember to make a true scale model of even the smallest of ships
would take up the entire table. So, some scaling down and foreshortening is need.
Priming:
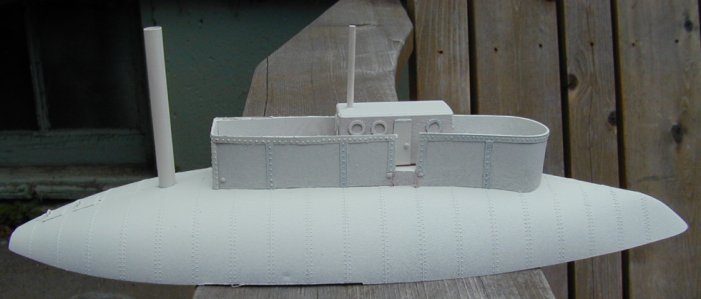
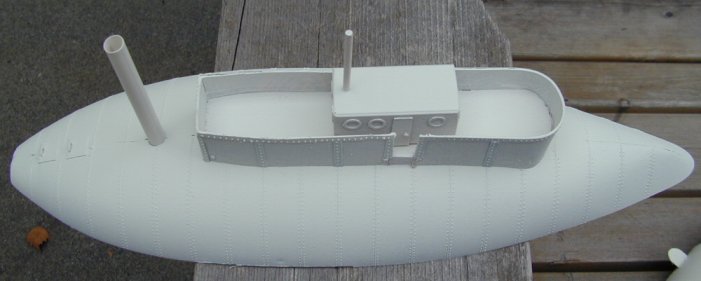
Added a few small details, a pair of hatches in the rear to load coal and a short mast
to the rear of the deck house to raise a flag on. I then gave the model a quick coat of primer. Now it is time to
research and consider the color scheme of the paint job.
More to come soon:
To return to The Iron Ram How To page, simply click here.
To return to The Building How To page, simply click here.
To see the finial models go to me Battles page VSF Battles.
Or you can go to the Model Gallery Page.
Or to head back to the The Victorian Science Fiction Page.
For more inspiration go to my Victorian Inspiration page or
theMajor General's.
or THE AFRIBORIAN CAMPAIGN. pages.
I hope to be able to add more latter.
Thank you for looking:
DyeHard
![]()


|Over All Home
|What's New
|VSF Home
|My Other Hobbies|
|E-mail|

This work is licensed under a Creative Commons License.