![]()
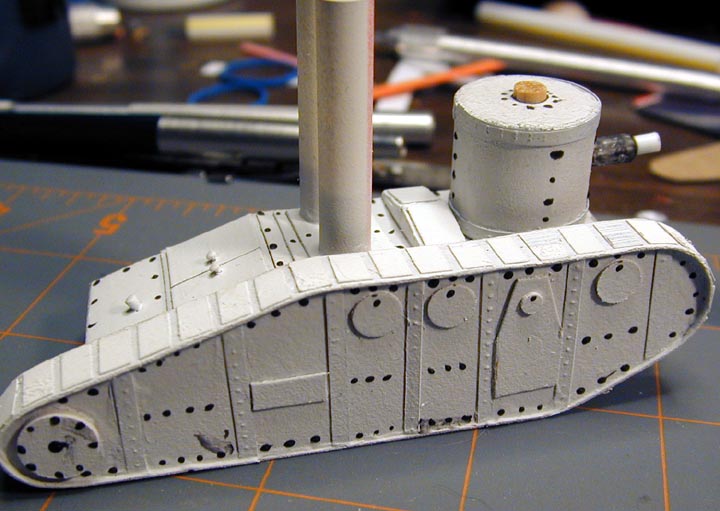
To convert toys and models to vehicles useful in our VSF wargames, it is convenient to
add features that are (at least by convention) Victorian in appearance.
Perhaps the convincing of these features are rows of rivets.
Below are several methods of producing rivets on your vehicles.

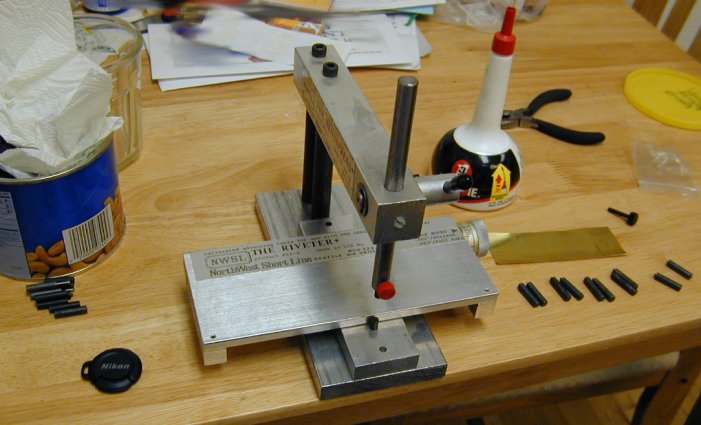
A close up of one of the various sized rivet press tools

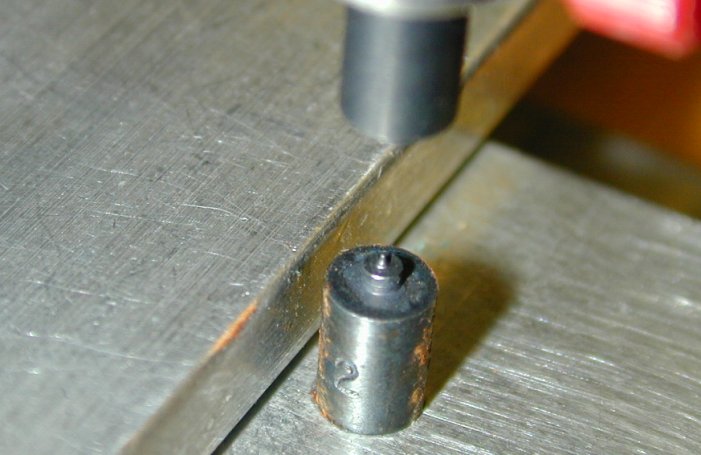
The THE RIVETER is a translator stage with a calibrated knob allowing one to position the impressions
at even or measured spacing.
Here we have some thin brass shim stock held to THE RIVETER's
translator table with some cheep spring clamps.
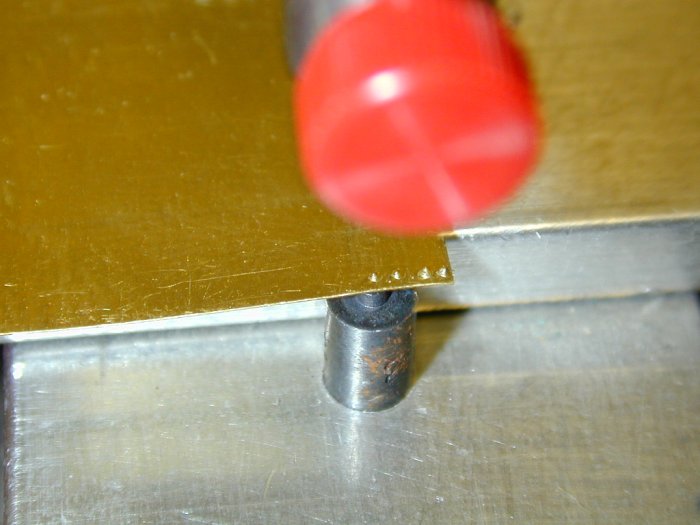
The rivet impressions are formed one by one and the knob turned to space them along the shim stock.
This is a rather time consuming process, but one of the few ways to assure proper spacing and rivet shape.
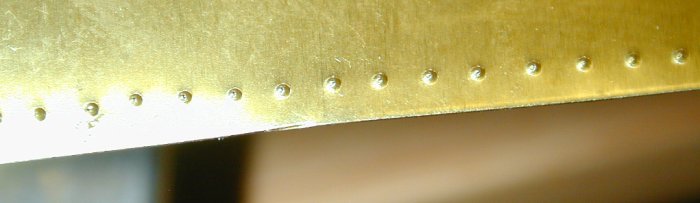
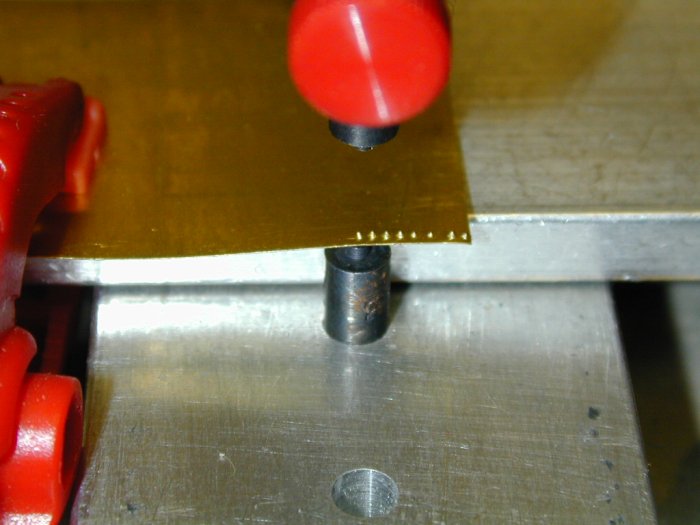
For this application, I simply impress a single row of rivets and release the brass from the clamps.
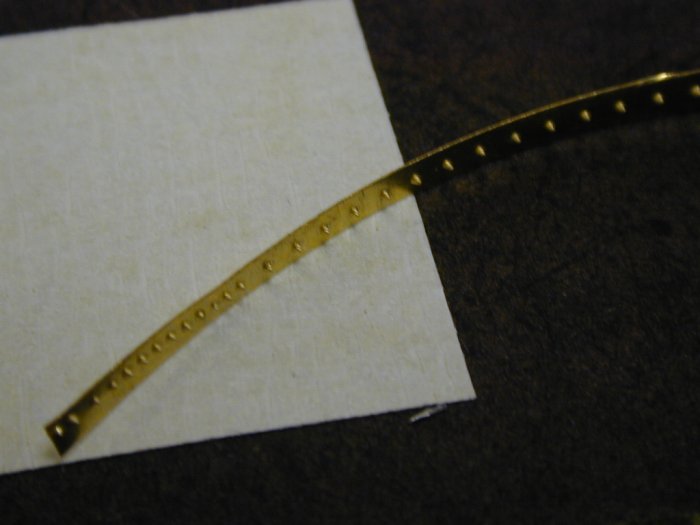
After trimming off a thin band of brass with a shears, we see the end result.
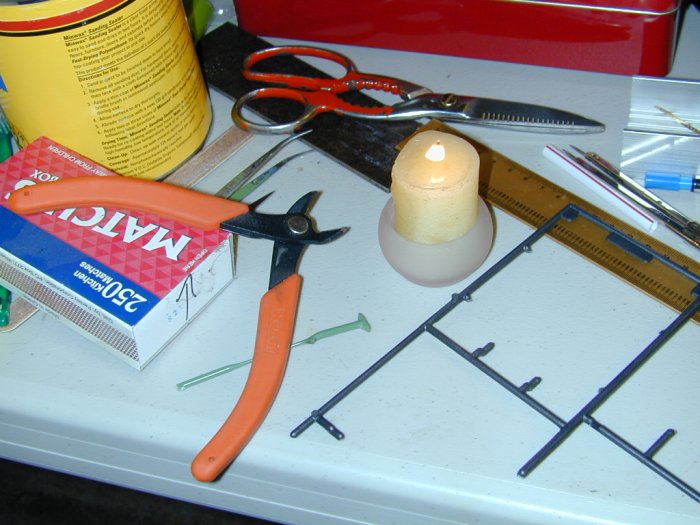
The basic materials: leftover plastic sprue from a model kit, a tool to run the sprue,
and a candle to heat the plastic.
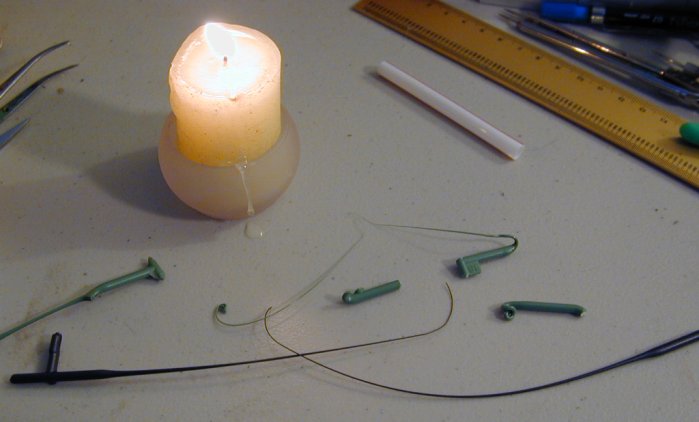
Cut a section of straight sprue and hold it one hand on each end just above the flame of the candle.
Rotate the sprue slowly and move it side to side over the flame.
Soon the solid plastic will start to soften and liquify. The trick is to heat a section as
evenly as possible.
Remove the spure from above the flame a gently pull the ends away
from one another.
The plastic will be drawn into a thin thread.
Most will be uneven of rupture during the drawing out.
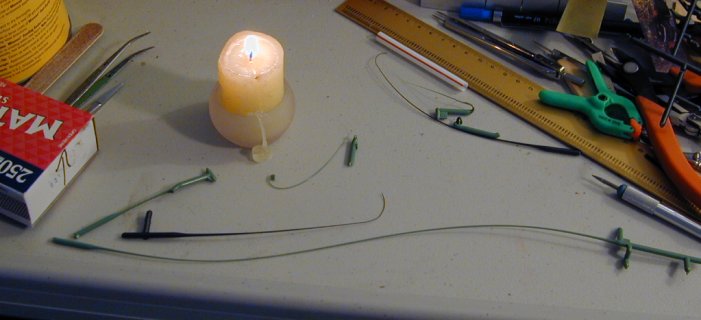
But with care a practice, one can draw out any number of plastic rods in a variety of thicknesses.
The remainder of this technique is very similar to the hole and ball method below.
I hope to add more about this soon.

Adding Rivets to House:
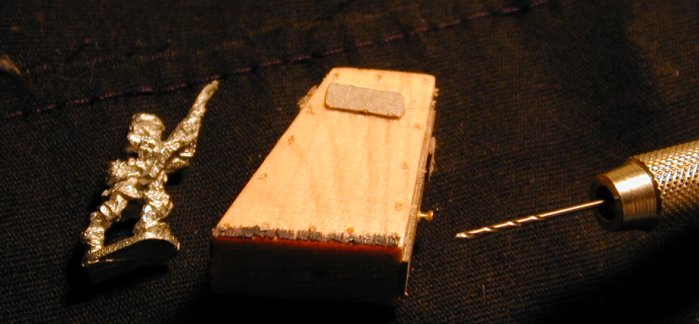
Using a pin vice and a very fine drill, I drill a sequence holes spaced to match where
I want rivets. The soft wood makes this very easy.
Adding "Glue in" Rivets:
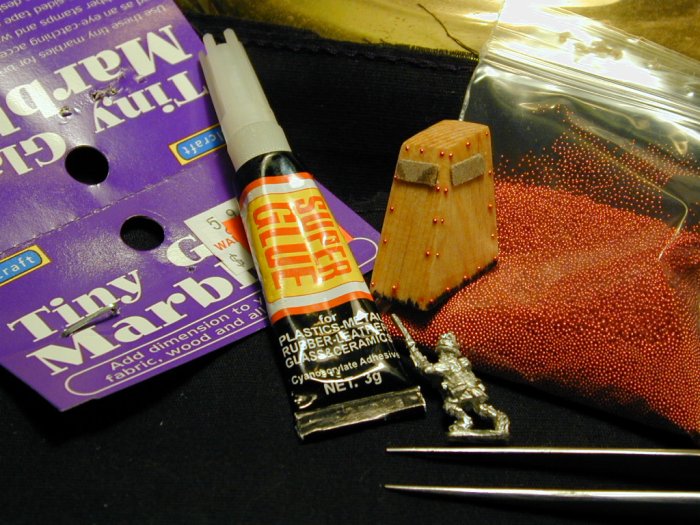
Here are the things you will need. Some small round objects to act as rivets. I found these
"Tiny Glass Marbles" in a craft store in the jewelry making section. I have been told that
by cutting open a water purification cartage one can obtain millions of tiny balls of the
exchange resin used to filter the water. Super glue is very desirable as it bonds well
without leaving a large glob of glue. A very fine tweezers and good lighting are also a must.
A very steady hand is also a big help.
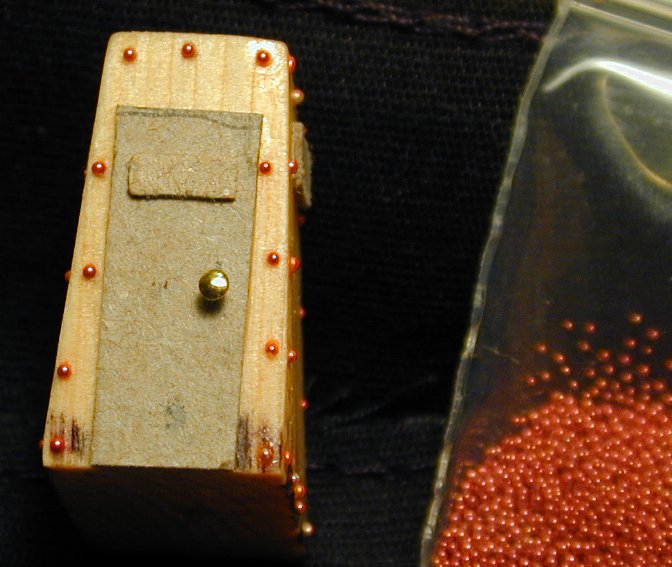
Adding "Glue in" Rivets II:

The glue is placed in three or four holes at a time and the small beads placed and
pressed into place.
Adding "Glue in" Rivets III:
The pattern used is up to you, but I find the even just a few rivets can enhance the
look of a toy being converted into a VSF machine. Once finished, I gave the pilot house
a quick coat of white primer.
Adding more Rivets:
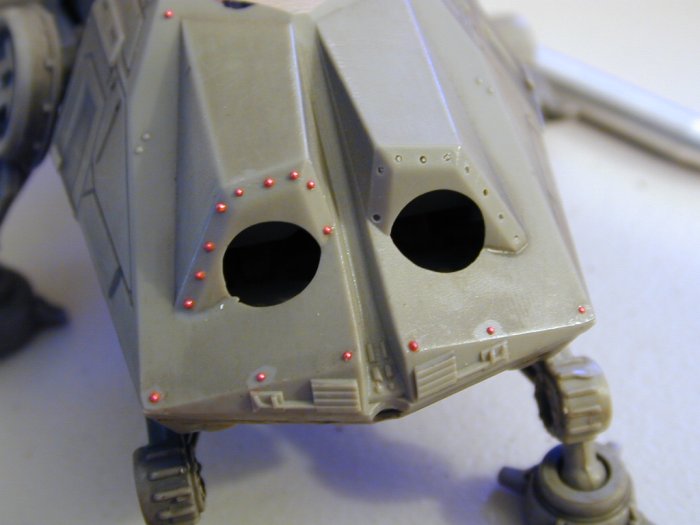
Using the same technique as on the pilot house, I added some rivets to the front end.
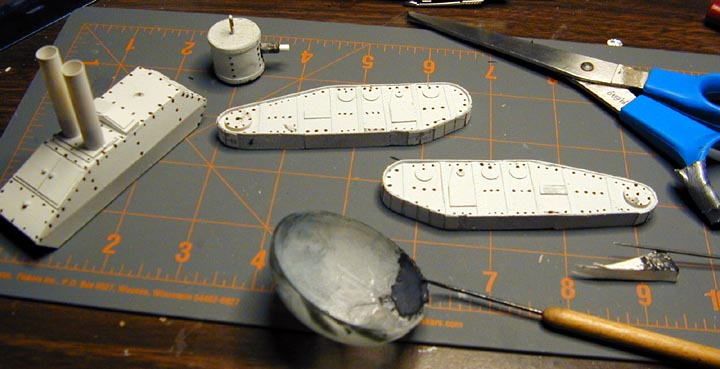
Just a quick look to check the layout of the rivets. One can see smudge marks of glue
spots scrapped off. If one works fairly quickly the mistaken and misplaced rivets are
easily removed with a cotton swab or X-Acto knife, without damaging the underling
surface. But care must be taken in handling the model as not to smudge a rivet with
a poorly placed finger.
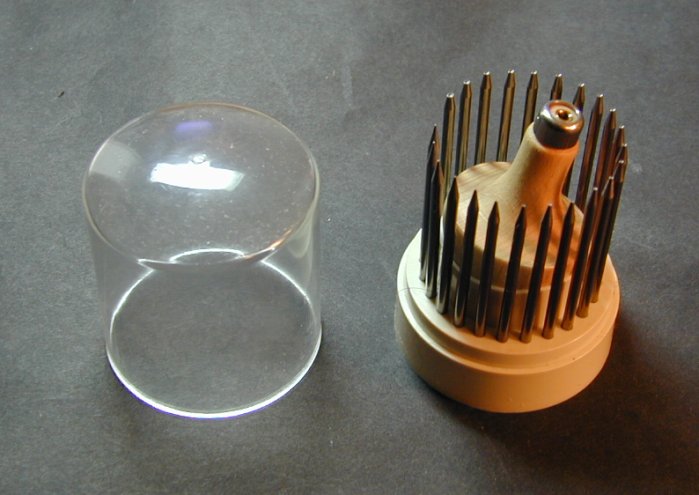
The set contains a set of steal bits, each with a number to indicate the size
of the bead that would be formed, that is the size of the cavity at the end of the tool.
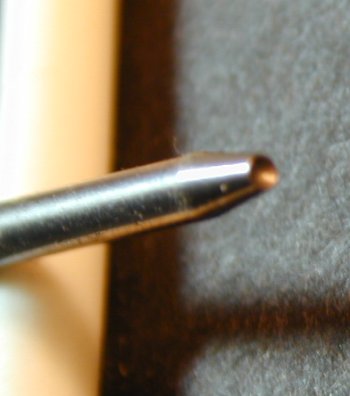
I found it difficult to capture a good photo of the tools end. I hope to report on my
experiments using this tool to form rivet heads.
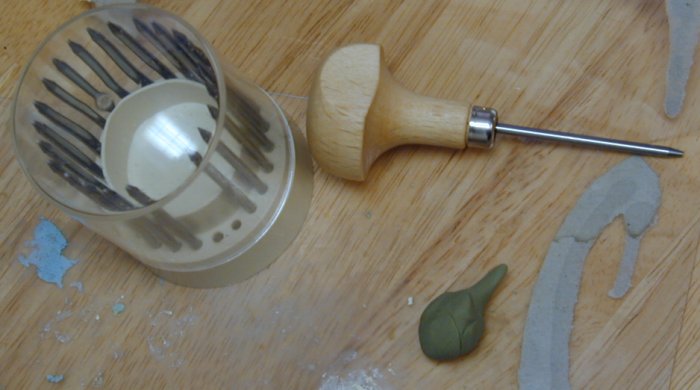
The tool can be used to make rivet heads with putty or polymer clay as seen on the
Boiler Plate page.
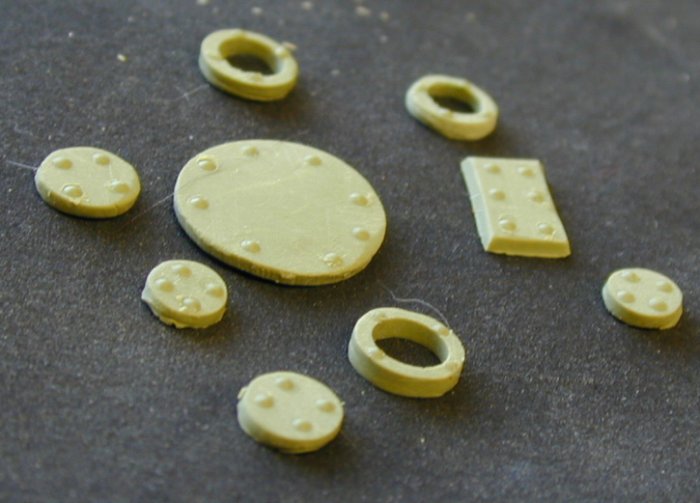
These detail parts required only two bakings. The plates and rings can be added to any model to
add to its VSF feel.
Another interesting site at Rivets by the Million , explains how one can use a water filtration device as a source for useful balls from which to form rivets.
Punch and die set for making rivets, both round head and hex head avaiable, desinged for 1/35th scale.
Grandt Line Products, Inc. makes a line of cast nuts and bolts as well as rivet heads in a number of sizes.
a little blurb on how to make rivet heads with putty.
Rivets seam to be a hot topic on the web. I have yet to do a single web search on this topic, yet I encounter many pages devoted to the modeling of rivet heads.
Although the rivet section is not too extensive, I feel remiss not to have a link to Terragenesis web page with its many helpful hints on terrain items.
I nice, if somewhat painful, method of using the Swiss Beading Tool to make rivet heads with lead foil is presented at Lance Whitford's modeling page.
And perhaps the most complete guide to rivet making is at the Large Scale Planes site.
More to come soon:
You can click on the following to return to The Smaller Ram page.
You can click on the following to return to The Larger Ram page.
To return to The Iron Ram How To page, simply click here.
To return to The Building How To page, simply click here.
To see the finial models go to me Battles page VSF Battles.
Or you can go to the Model Gallery Page.
Or to head back to the The Victorian Science Fiction Page.
For more inspiration go to my Victorian Inspiration page or
theMajor General's.
or THE AFRIBORIAN CAMPAIGN. pages.
I hope to be able to add more latter.
Thank you for looking:
DyeHard
![]()


|Over All Home
|What's New
|VSF Home
|My Other Hobbies|
|E-mail|

This work is licensed under a Creative Commons License.