![]()
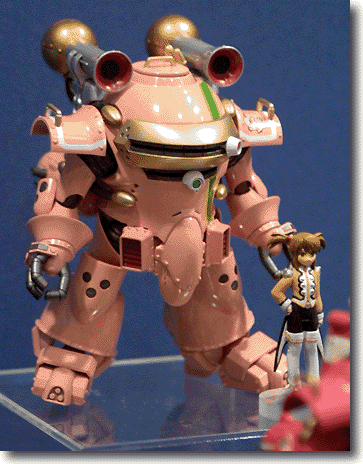
Despite being designed to be 1/24th scale and my 15mm collection is closer to 1/100th scale, I thought
the over all look of the Koubu had much to offer in VSF. I envisioned a large walking tank instead
of the powered armor it was designed to be. To aid is the illusion of scale, the Koubu would have
to loose any items that reflected its 1/24th scale origin. This was primarily its weapons and the
handles. I also wanted to reduce the Mecha look, so I thought I would remove the arms as well.
This would impart the armored box on legs look, as opposed to a mechanical man look. This is a common
approach to my work as presented on the Robot Roundup page.
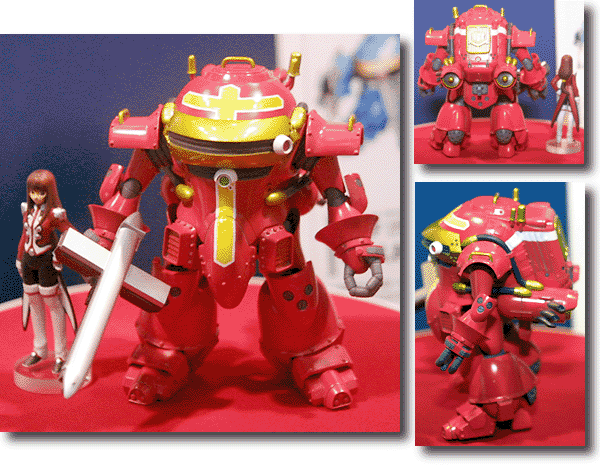
This is in contrast to the Automaton Infantry as presented on Boilerplate's page and my Automaton preview. With Automaton, I envision un-manned vehicles with arms to aid either in their attack or in intimidation of the enemy.
To address this void, I decided to employ polymer clay. In this case a blend of Sculpty and Fimo.
This material is nice in that it does not harden on its own and is not overly stick. This allows
of an endless period of exploration. Initially I was intending to simply fill in the shoulder socket,
but after trying several different forms, it became clear that something functional was needed to
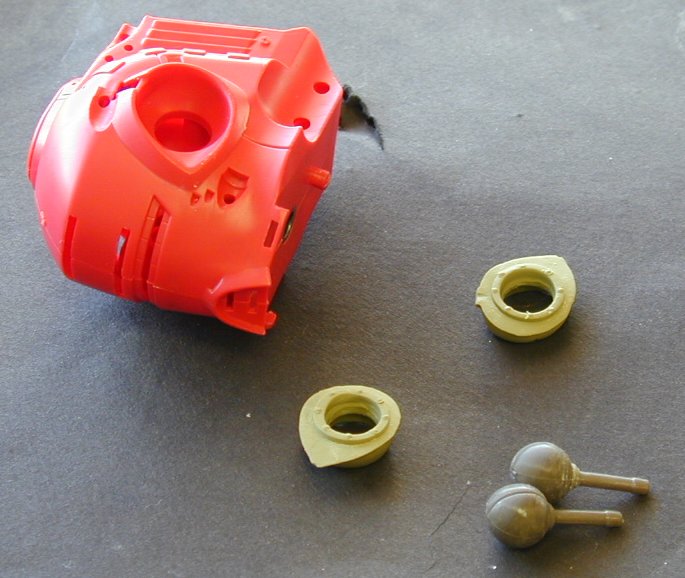
replace the arm. After some thinking, I decided of gun mounts. At first I tried out a sponson type
casement as on the sides of WWI British tanks, but then decided to use the leftover ball mounted
guns from the Land Titan as described on the How To
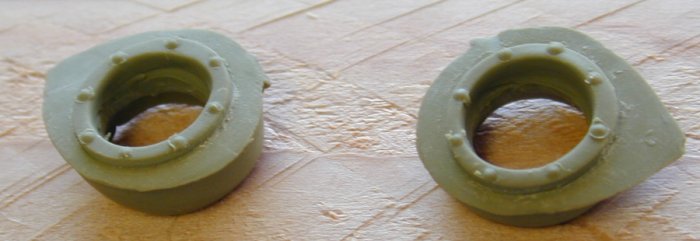
page. The balls would sit deep in the shoulder socket held in place but a riveted ring made of polymer clay.
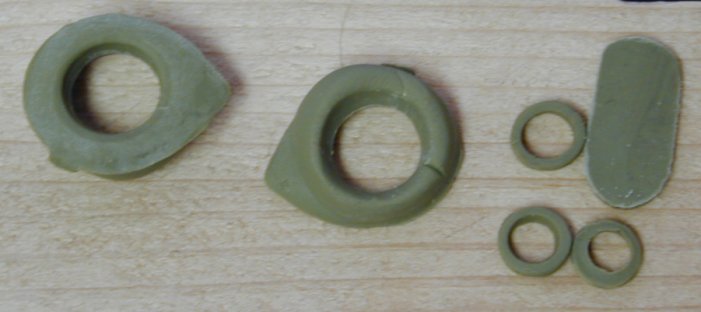
Above you can see the basic plug to hold the ball in place while filling the remaining void in
the socket. Also some other detail items to help convey the new scale of the model.
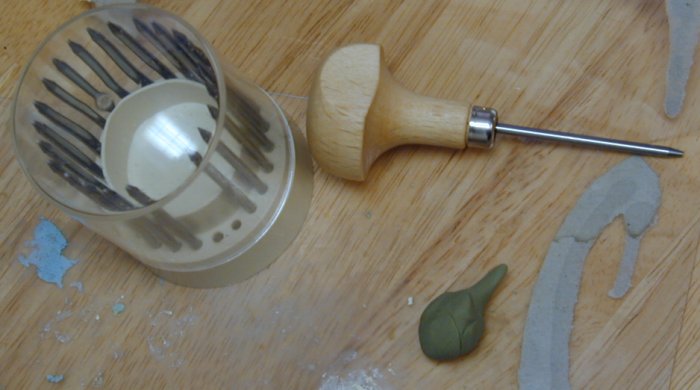
The key with polymer clay is to work stepwise. One can harden the work and then add to it with fresh clay.
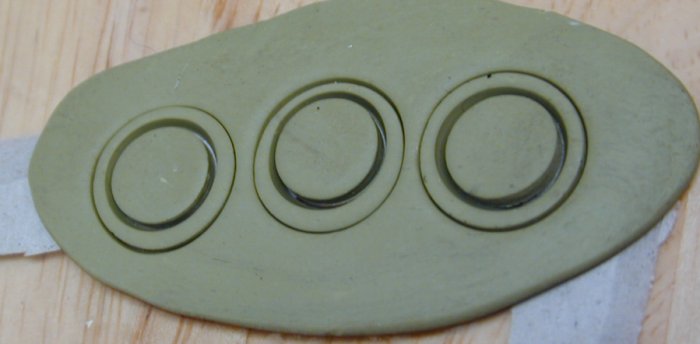
Here I am attempting to cut the rings to secure the ball gun. The plugs are baking and will be trimmed and
sanded in preparation to receive the rings. Water can be use to lubricate and as a release agent for the
polymer clay. I used a set of round punches to press the circles cuts into the clay.
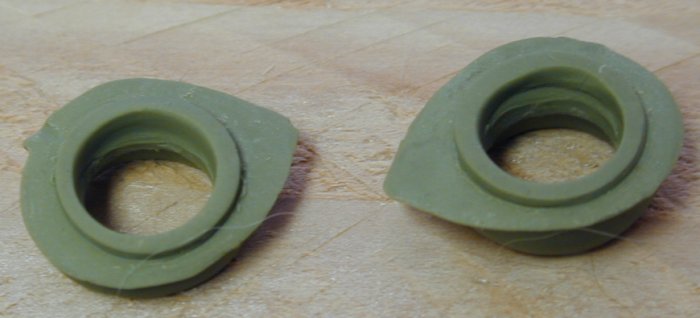
The rings are added to the plugs and baked to harden.
To add to the VSF feel of the part I decided to add rivets to the retaining rings. This was done by forming
small regular dots of fresh polymer clay to the rings with a tool I introduced on my Rivets
page. This is the Swiss Beader, a set of steal tools with a small dished out tip. By pressing fresh
polymer clay onto the already baked ring with a slight rocking action, a very nice rivet head can be made.
This technique is explored in more depth on the Making Boiler Plates
page.
The resulting parts are baked again to harden the rivets. Once baked the polymer clay becomes firm and
retains its shape. At this time is can be trimmed with a sharp knife, drilled and even sanded.
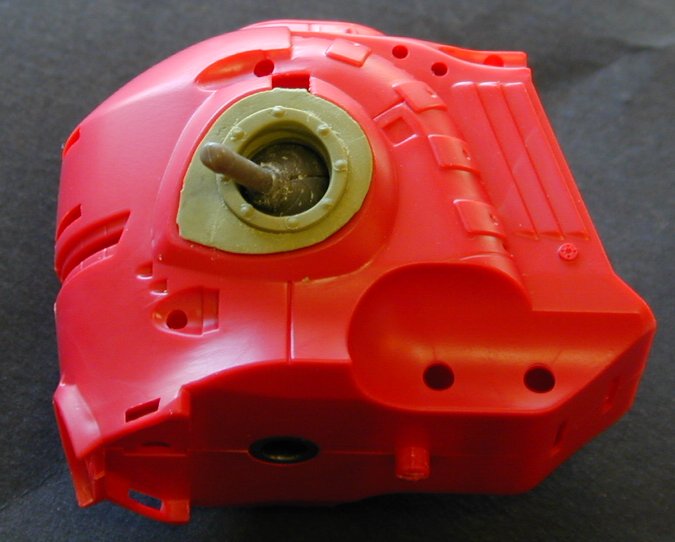
Once assembled the ball gun is still free to move so that it can be pointed as we whish.
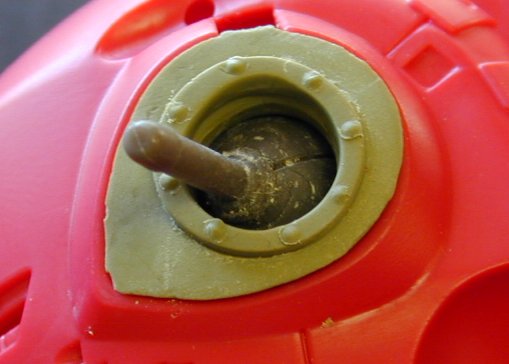
A detail photo of the ball gun and retaining ring. In finial assembly the polymer clay plug should
only need very minor filling to allow it to blend in with the main body of the Koubu kit.
This is my fist attempt at a bulkhead type steal door. This is again made of polymer clay.
This is covered in more detail on the Boiler Plate page.
.JPG)
The leg section of the robot are built as per the instructions.
.JPG)
This block on the ankle seems a bit plain and a good spot for an access hatch.
.JPG)
The first step in to fashion a rectangle of polymer clay, taking some care to the angles of the edges.
.JPG)
Some rivets add that extra touch. See the Boiler Plate page to see
how it was done.
.JPG)
But the Body/Head seemed a little plain and in need of VSF enhancement. To that end I am using polymer
clay to add extra details to the kit. The slots on the from of the KouboF suit were made to receive some
moving parts and the main visor. I decided to leave the visor off to alter the kit's look.
The slots will serve well as viewing slits, but the center slot seemed one too many. Here I cover it
with a polymer clay panel with a gun mount in the center.
.JPG)
An extra plate on the "forehead" will help hide the seam and the injection points where the part was
attached to the runner. Overall, I am going for a cast hull with bolted on plate look. I look towards
stream powered railroad engines for inspirations.
.JPG)
Again with the rivet heads as per the Boiler Plate page.
I will have to go back and remove the baked in finger print. It was not so noticeable in person as in this
photo.
.JPG)
Here is a quick test shot of the kit with the new polymer clay parts added.
.JPG)
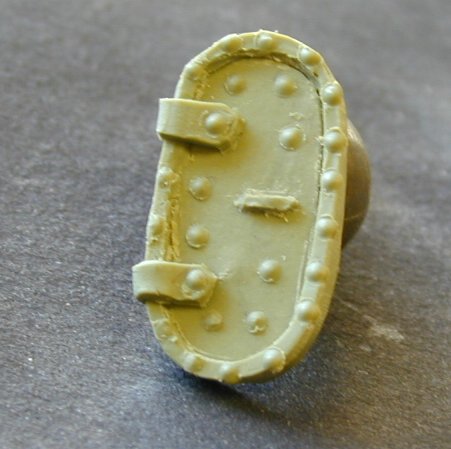
This is the cover to the "backpack" part of the kit. It came with a heraldic crest, which did not fit into
my vision of a VSF walker. I am filling the void with polymer clay.
To start VSF over go to The Victorian Science Fiction Page.
To see where this inspiration leads go to How To Page.
For more models go to Model Gallery Page.
To get all the way home go to Bryan's Home Page.
I hope to be able to add more latter.
Thank you for looking:
DyeHard
![]()


|Over All Home
|What's New
|VSF Home
|My Other Hobbies|
|E-mail|

This work is licensed under a Creative Commons License.