![]()
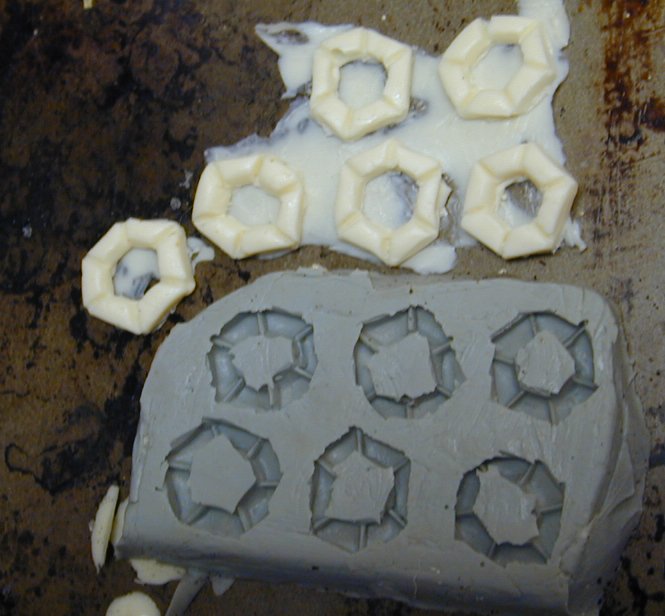
I had several of the six leg walkers, so to save work I thought I would cast
copies of the pilot house I planned on mounting on top of each.
To see more about the making of the six leg walker you can check
it out the six leg walker page.
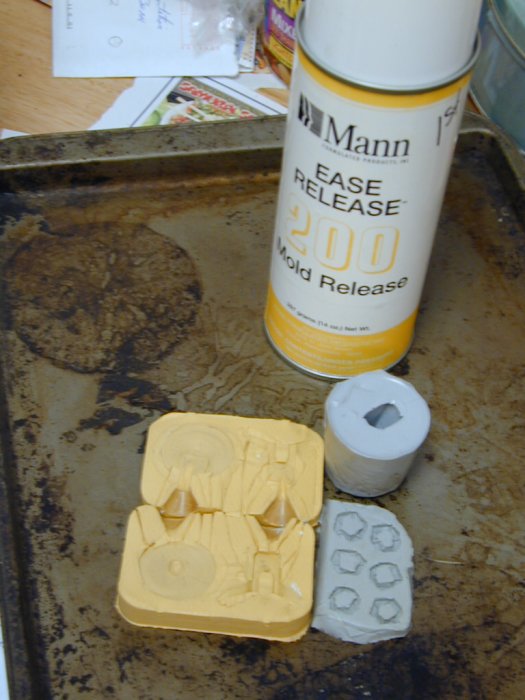
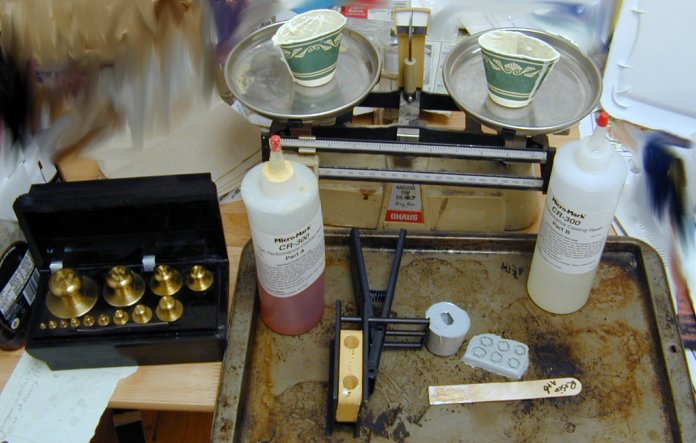
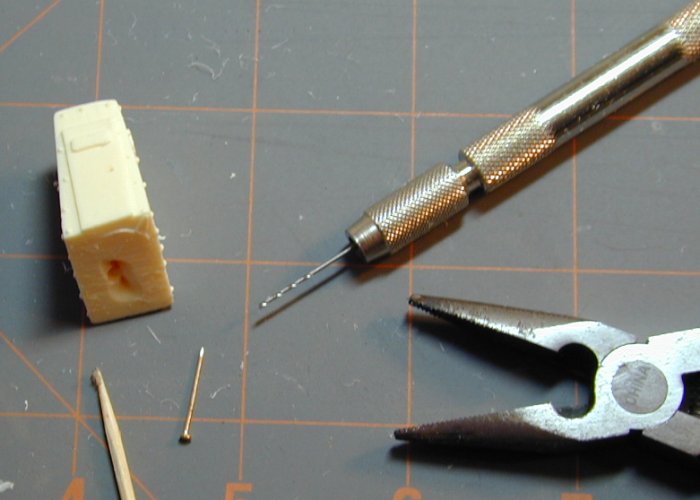
To make resin castings requires quite a pile of supplies and tools.
The supplies can be obtained from many craft and hobby suppliers.
What you will see below were purchased through Micro-Mark .
The tools are a hodgepodge, some are available through Micro-Mark .
The balance and weight set I picked up at a university surplus sale.
But Ebay would also be a good place to look.
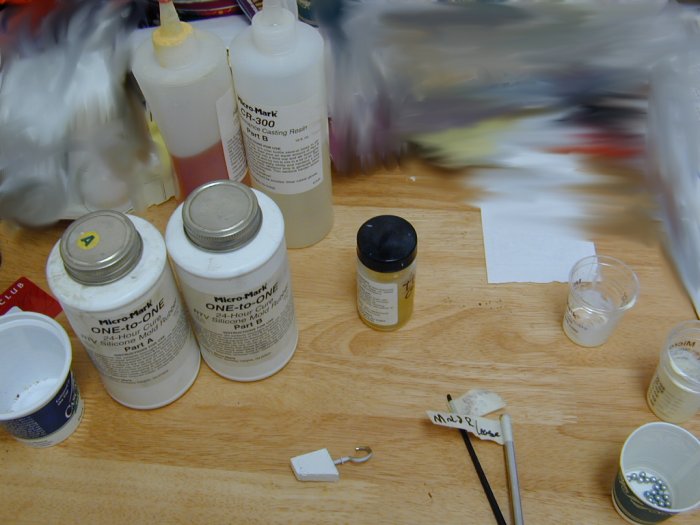
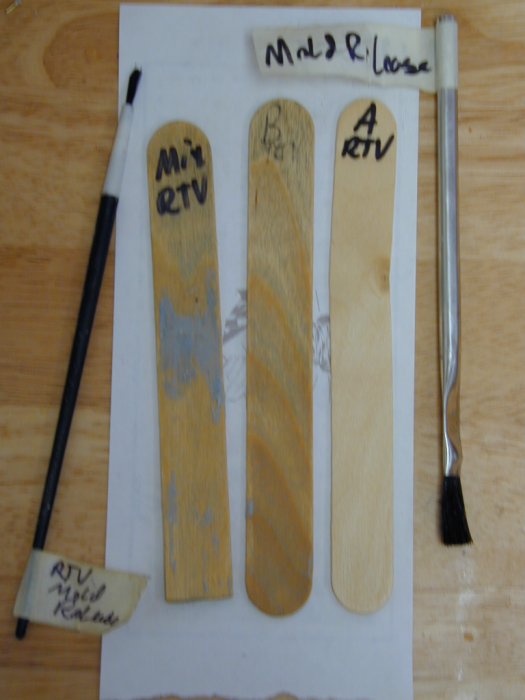
Here we see the two part room temperature vulcanizing rubber (RTV), the two part resin,
the solvent based release agent, cheep brushes and various disposable containers.
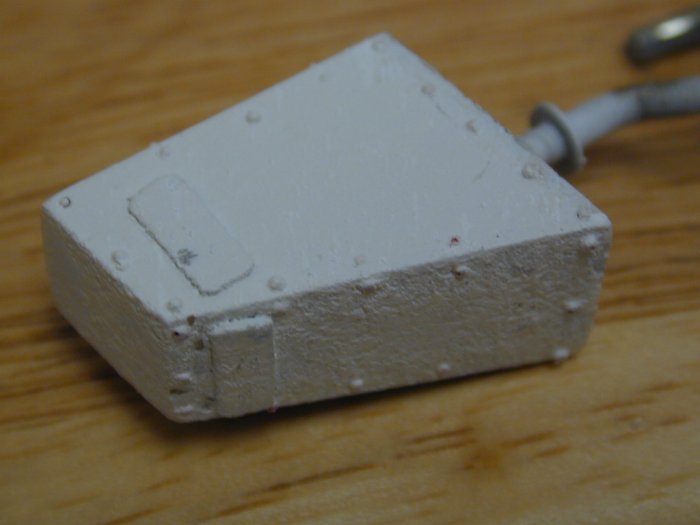
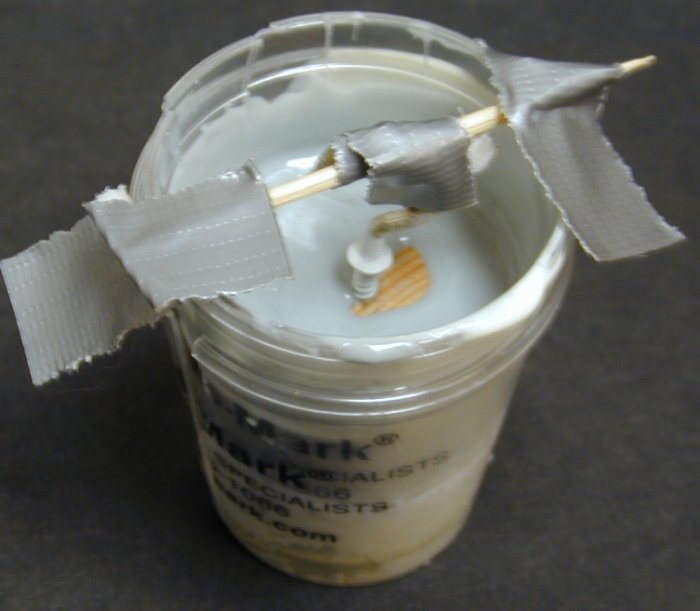
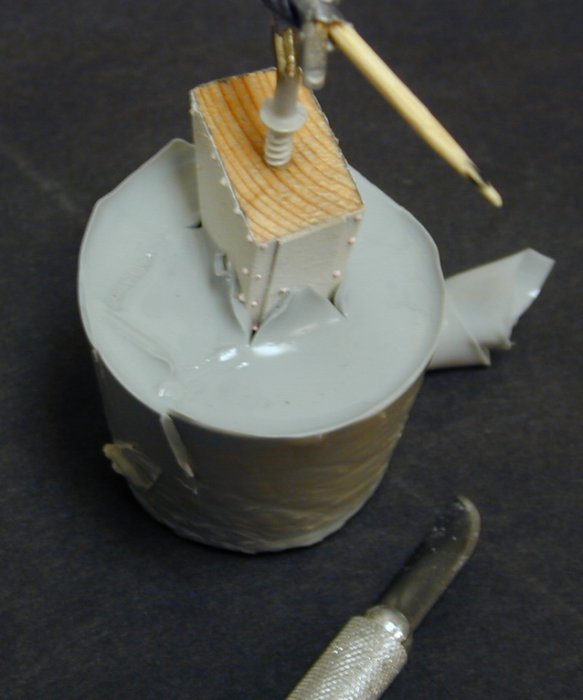
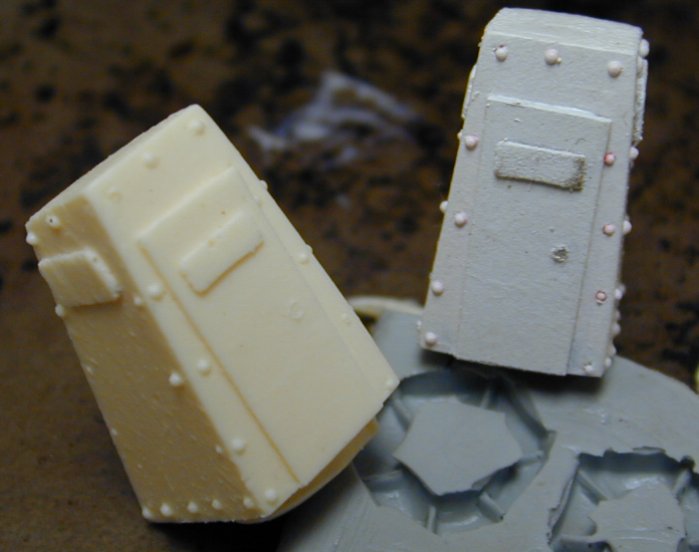
The Master:
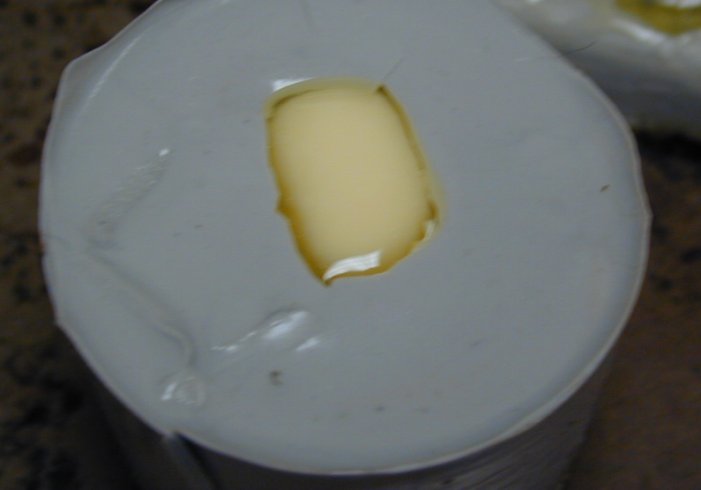
The pilot house is also convenient as its base is not a finished surface.
This will allow use a way to pour the resin. The simple wedge shape is ideal for
a one part mold. I am using a small disposable cup a the mold form. It is important
that no part of the master will touch the sides or bottom of the form.
Preparation of the Master:
Preparation of the Form:
Pouring the Rubber:
Submerging the Master:
Finishing the Mold:
Casting in Resin:
Inspection and Consideration:
To return to The Building How To page, simply click here
Thank you for looking:
DyeHard
|Over All Home
|What's New
|VSF Home
|My Other Hobbies|
|E-mail|
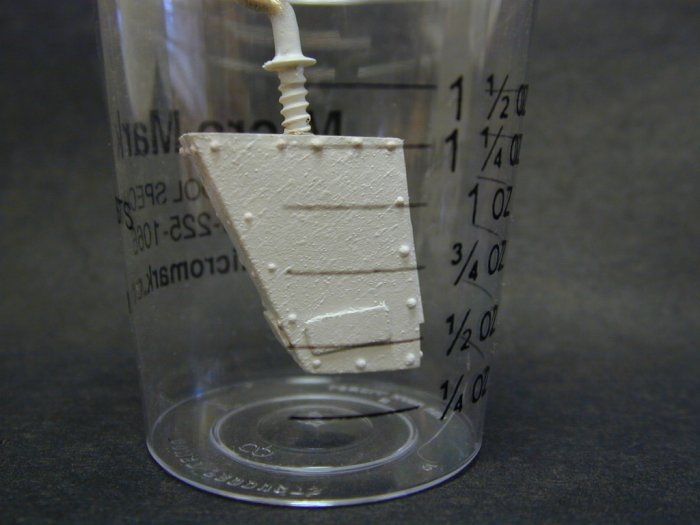
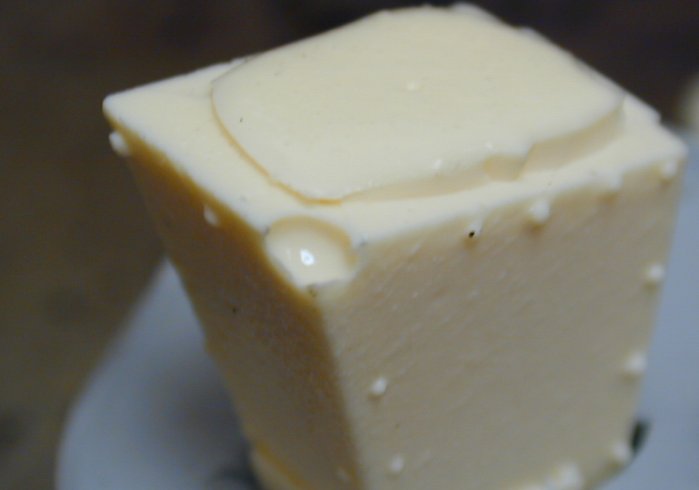
The master is sealed with primer.
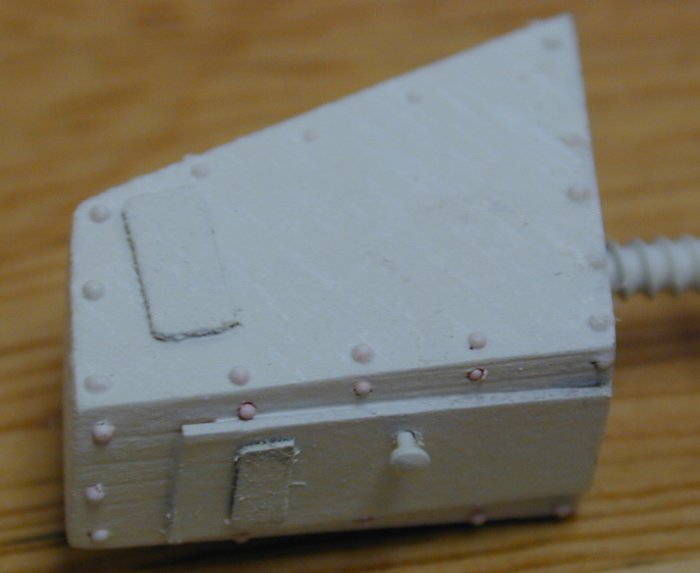
The rear of the pilot house does feature a door knob which would not cast well
as it has a large undercut and a very thin support.
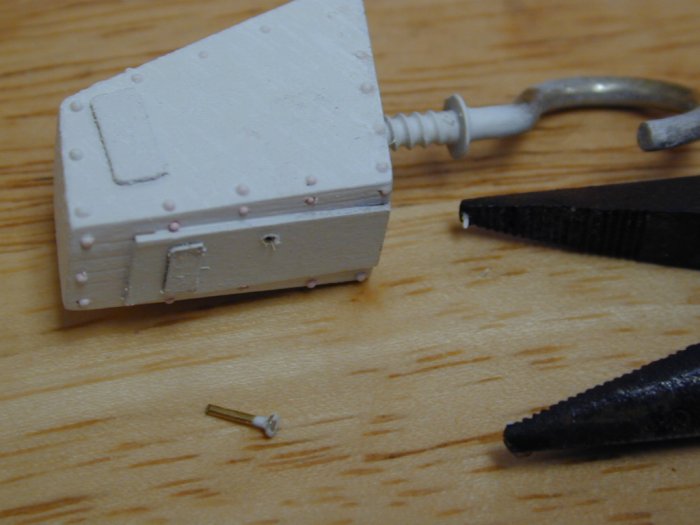
The best solution was to simple remove the offending part.
A quick pull with a needle nose pliers removed the pin that made the handle.
This door knob can easily be replaced on each of the copies once they are cast.
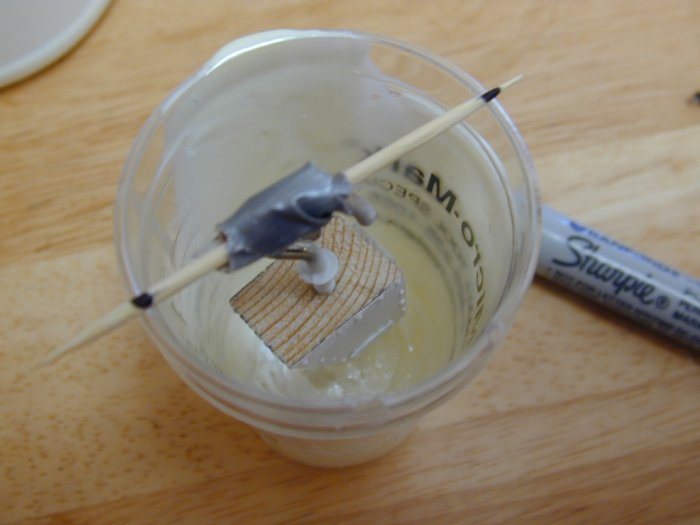
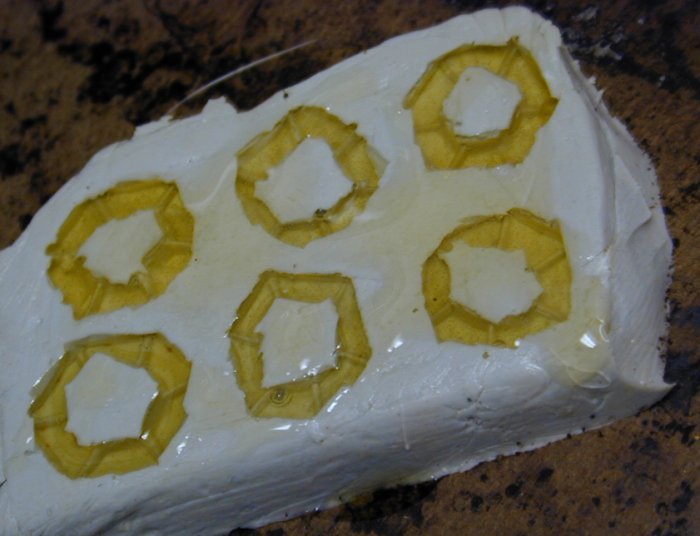
The master is centered away from all sides. I am using a toothpick to suspend the master,
and mark it with a pen to assure I have the proper alignment.
And making sure it is clear of the bottom. Most RTV are not see through,
so care is needed in planning to assure a good finial mold.
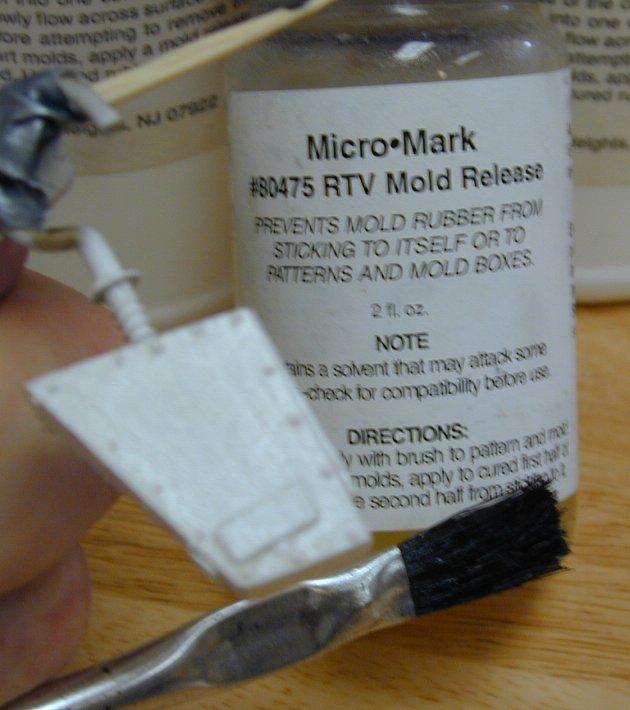
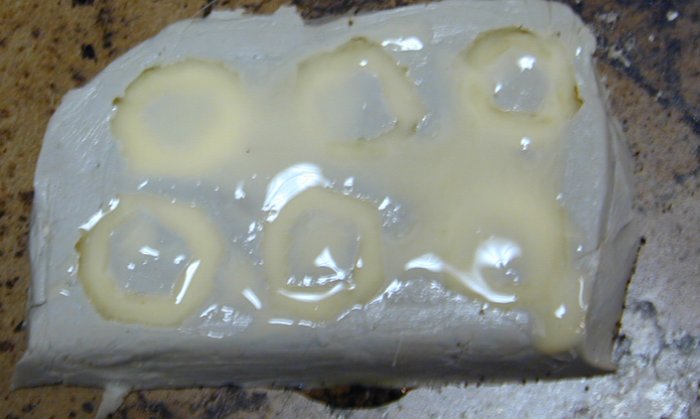
I paint the master on all sides with a release agent. One can make a simple solution
of dissolved Vaseline in mineral spirits. But here I am using a pre made solution sold by
Micro-Mark .
Make sure to use a very cheep brush for this as the grease will not wash out.
One could also coat the form with the release agent, but I am skipping this as I plan to
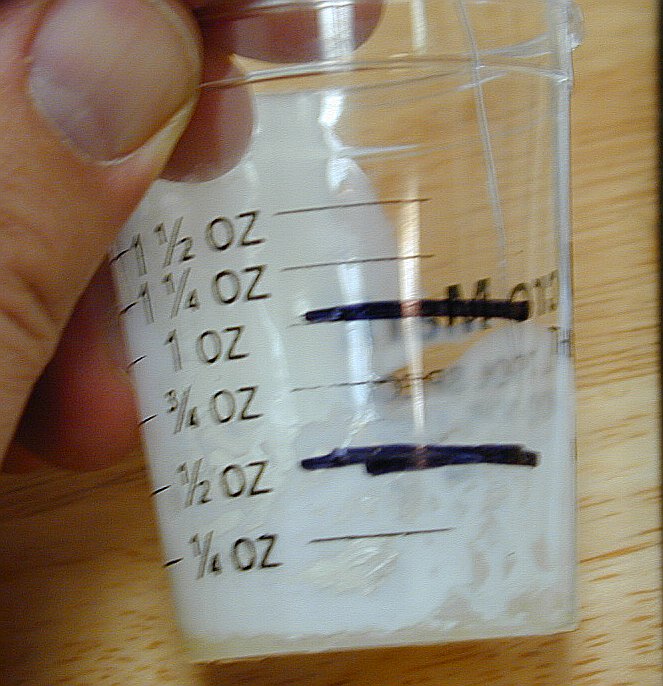
brake the form apart when done. Next the volume of the master most be estimated or measured.
By using a graduated cup, such as that used for the form, one can experiment with water to
see how full the form must be filled with RTV rubber to properly cover the sides of the master.
One a value is found, the portions of each part of the RTV rubber mix are calculated.
This is very easy with this particular mix as it is 50/50. Marking the side with bold
lines will help remind me when pouring the RTV rubber parts. Because of the small size
of this mold, I am not going to measure out the parts in separate containers as the instruction
suggest. This "one pot" method works fine for this job.
Here are some stir sticks needed for the preparation a pouring of the RTV rubber.
I have labeled every thing I use here to prevent cross contamination. The stick can be
attained from most craft stores or from Micro-Mark
directly. I have cut the tip off of some of the sticks to allow me to better reach the
corners and bottom of containers.
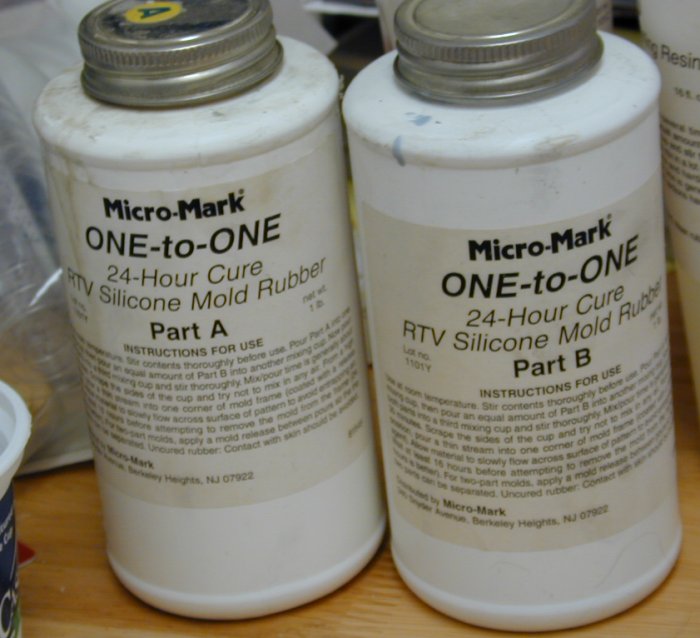
The components of the RTV rubber, "Part A and Part B",
are each mixed well in their own container. The components tend to separate over time.
Once each is fully mixed, pour one part into the form up to the bold line. As soon
as the second part begins to mix with the first you are racing against the clock.
Most RTVs have long cure times, but it is good to be mindful of what is happening.
Carefully pout the second component to bring the fluid level up to the second bold line.
And mix! Mixing is a bit of a problem as you must mix well, but not incorporate too much air.
There is no ideal solution, so I usually make sure the mix is complete and try and force
the air out as best I can.Most brands of RTV rubber offer the parts in two different colors,
this can be very useful in judging if the mixing is complete.

By tapping the from on the table, many of the air bubble can be forced to the surface.
Alternative include using vacuum chamber and other more high tech solutions. For this job,
tapping will have to do.
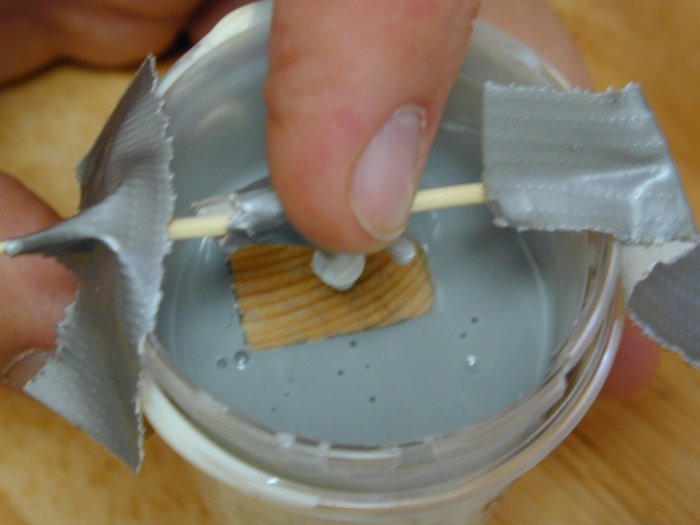
Now after the air bubbles have been worked out but before the RTV rubber can start to cure,
place the master into the RTV rubber mix. By slowly dipping one corner into the rubber and
slowly working it down into position air will not be trapped against the master. An alternative
is to quickly dip the master and pull it back out. One can then use a brush to assure full
coverage of the master with rubber by working it into all the detail areas. Then the master
can be returned to the form full of RTV rubber. Make sure to place the master as planned.
The marks on the supports help to guide you.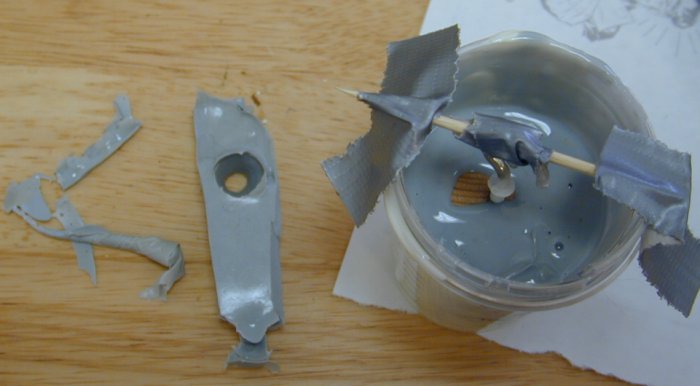
I use tape to help hold thing in place. Checking the level of rubber in the form I see that
the master is not quite fully covered. I have save chunks of the same rubber from other
attempts to make molds. By ripping off small chucks and adding them to the mix, I can raise
the level. The cured rubber will bond to the new mix as long as it is not contaminated with
such things as grease or dust. I often "recycle" old molds this way.
Once satisfied with the
level of the rubber and the position of the master, the form is set aside to cure. This is a function
of the RTV rubber used and environmental conditions. In this case 24 hours will due.
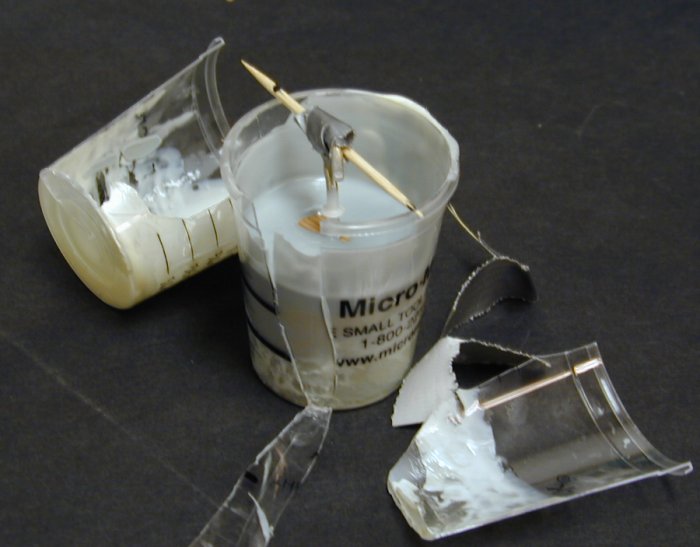
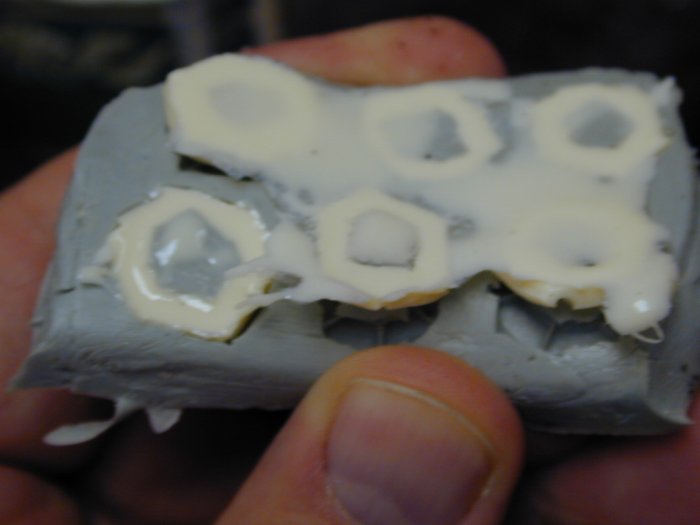
After the cure time, it is time to free the mold from the from. Some molds require
the form to help them keep their basic shape. This is not the case here, so I simple peal the
form off the cured RTV.
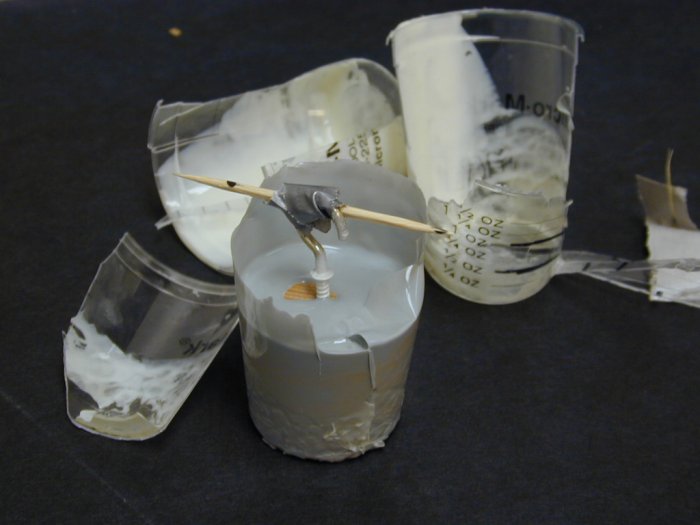
Cutting away unwanted parts leaves the completed mold. This can be saved to
use in the making of the next mold.
The RTV rubber is quite fragile and very easy to cut. Care must be taken not to tare it in handling.
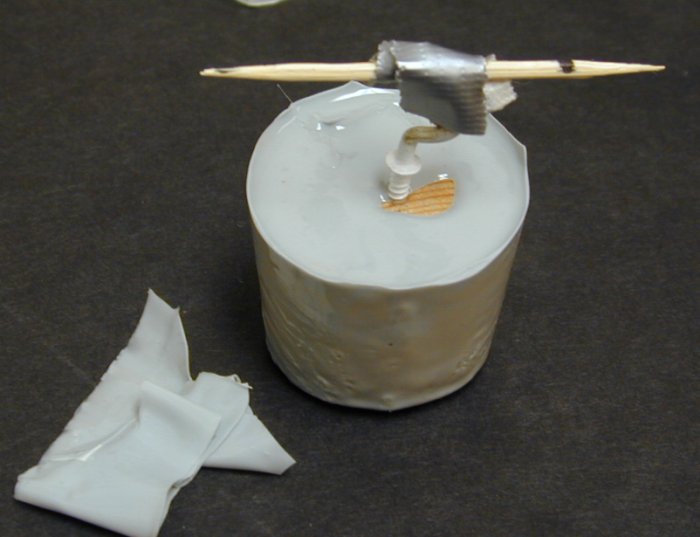
Take care to gently squeeze the sides of the mold to allow air to pass between the master and the mold rubber.
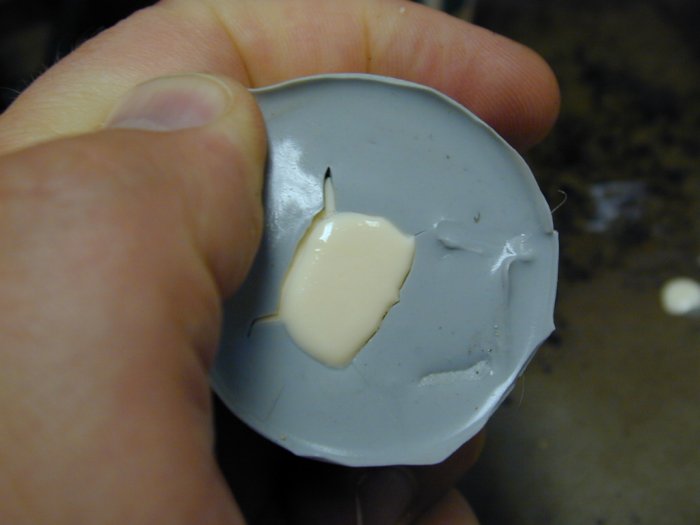
Small slides with a razor help to free the was for the removal of the master.
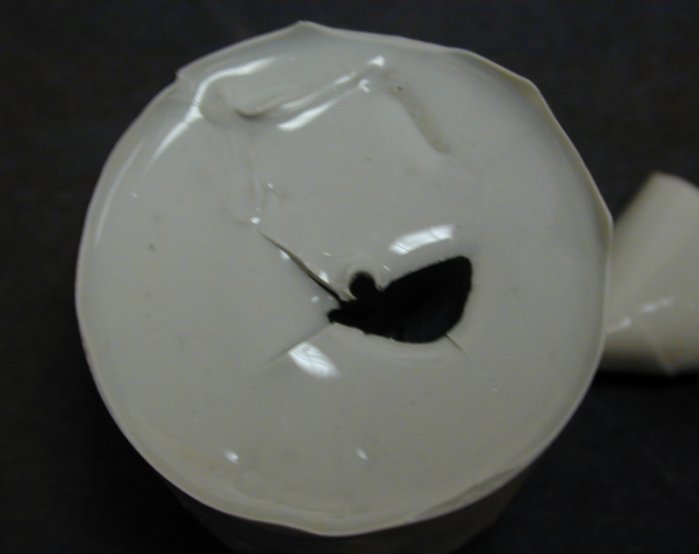
Once the master is removed the mold is inspected. The opening at the top does not appear
large enough to allow an easy pour, so it is enlarged.

A small sharp scissors work well for this.
It is very difficult to photograph, but you can see the detailed impression left in
the internal cavity of the RTV mold.
Now with the completed mold it is time to start the casting process. The mold is sprayed with
a release agent to prevent the resin from sticking to the mold. The release agent was
purchased from Micro-Mark .
I spray several other molds to accommodate any extra resin. A tray (an old cookie sheet in this case) is
use to contain any spillage.
Assembling the required items to cast in resin. A pan balance is very useful in weighing out of the resin.
A good set of scale weights is also a big help. The resin comes in two squirt bottles. Disposable cups
and a stir stick are needed to mix the resin.
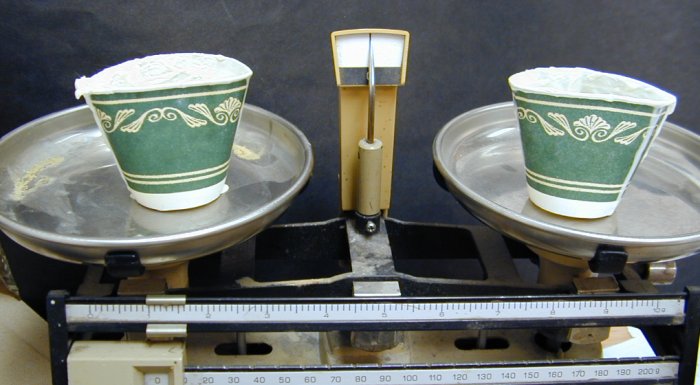
The cups are put into balance with the built in slides on the balance.
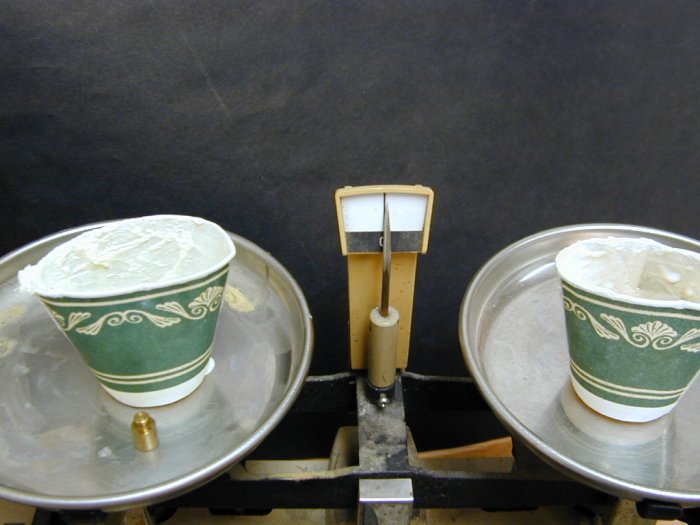
A small weight (in this case 5 grams) is placed one side of the balance, and the scale
brought back into balance by dripping the part A resin into the cup opposite the weight.
Then a second equal weight is placed on the left pan and the scale brought back into balance
by adding the part B resin. The resin is then quickly mixed and poured into the molds.
Once mixed the resin must be poured quickly to fill the molds before the resin starts
to gel.
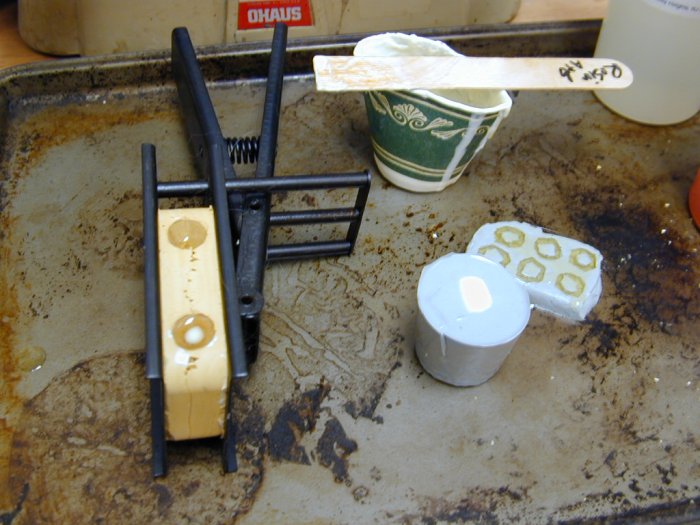
A second, third or even forth mold is filled with the extra resin. Here we see some windows
for my Martian buildings.
Soon the resin begins to gel, as seen by the growing fogginess in the originally clear resin.
The curing time is a function of both the resin and the environmental conditions. Here the
cure time is about 15 minutes.
By working the sides of the mold the casting can be slowing freed from the mold.
The RTV is very flexible, but care need to be taken not to rip it.
With care, by working around and round the mold, the parts seem to free themselves.
The same method is used with the pilot hose, but as it is a much deeper mold the progress is
slower and requires gentle pulling of the casting to free it.
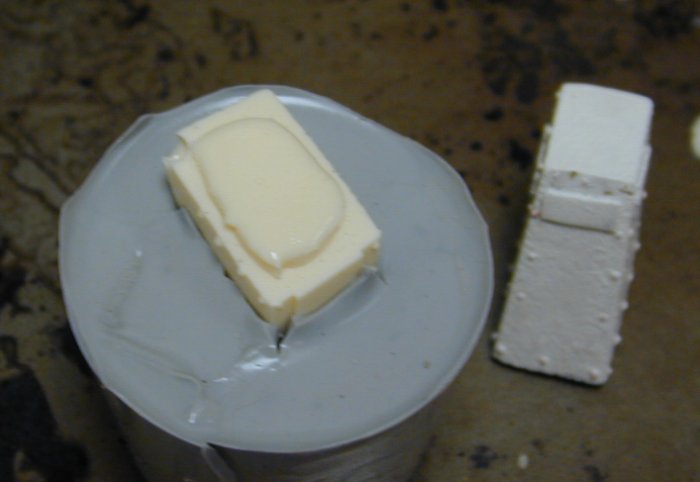
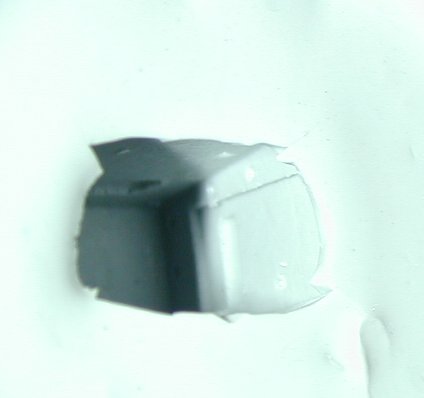
With the part freed, it is time to compare the result to the master.
It appears an air bubble was trapped within the mold when filled with resin.

By trimming the rubber and extending the slit to the corner of the cavity the trapped air
should be vented during the pour.
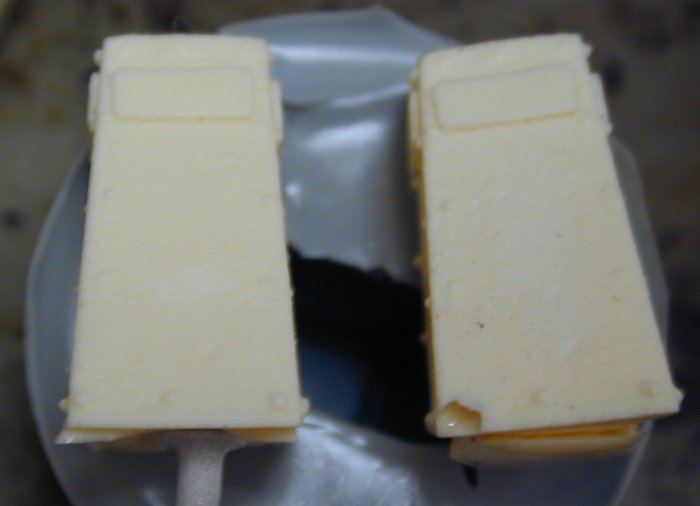
Now comparing a second casting to the first we can see that the problem is avoided.
Finial Processing:
With a successful mold, one can now cast as many parts as will be needed.
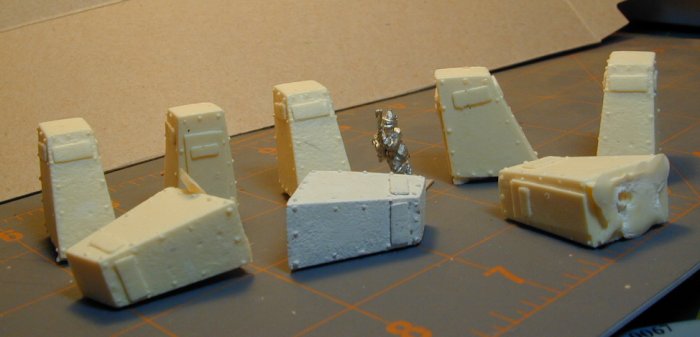
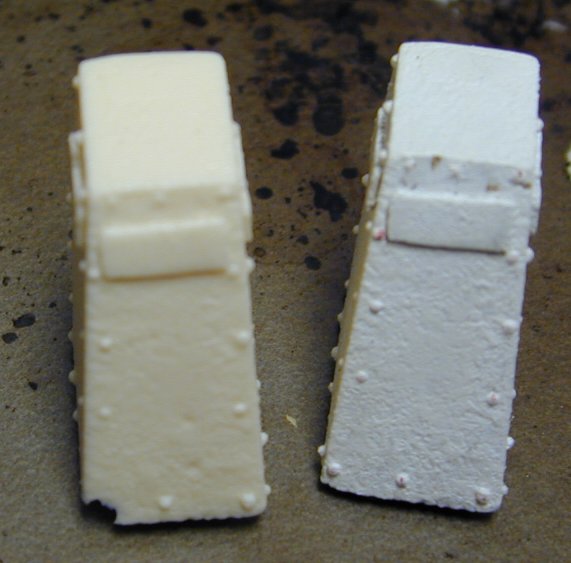
The bottom of each casting is filed and sanded level and
each of the castings needs to be washed to remove the release agent.
Disk soup and a tooth brush does the job well.
The door knobs which had been removed from the master can now be added to each casting
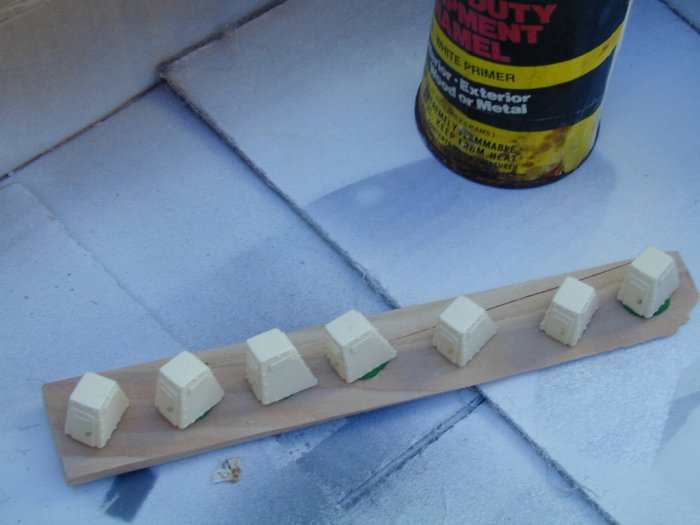
The castings are secured to a stick for priming.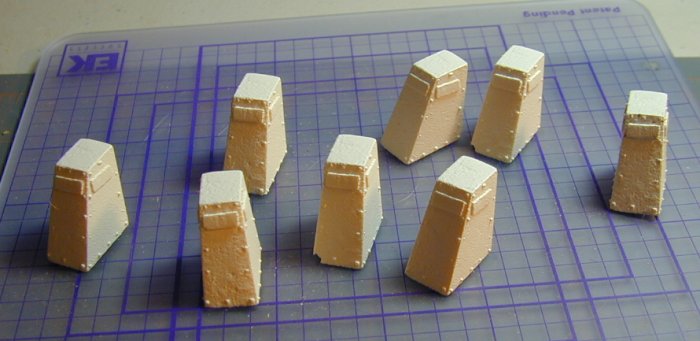
The pilot houses are now ready to be used on the models.
To return to The Building How To Six Leg Walker, simply click here
To see the finial models go to me Battles page VSF Battles.
Or you can go to the Model Gallery Page.
Or to head back to the The Victorian Science Fiction Page.
![]()
You can write me at:
e-Mail


This work is licensed under a Creative Commons License.
This work is licensed under a Creative Commons License.