![]()
Let me tell you about a little trick one can use to good effect on 15mm scale figures and equipment.
These items can be very difficult to produce a shading effect on. One can attempt
blending the paint in the recessed areas of such small figures. But due to there small size,
it is difficult to gain access to these recesses and the small quantities of paint tend to dry
quickly. As a short cut,
I like to use the "Miracle Dip" method. This
method uses a liquid stain which fills
in the recesses with a dark pigment, while leaving relatively little color on the raised areas.
Why fight with nature when it can work for you?
Here is how it works:
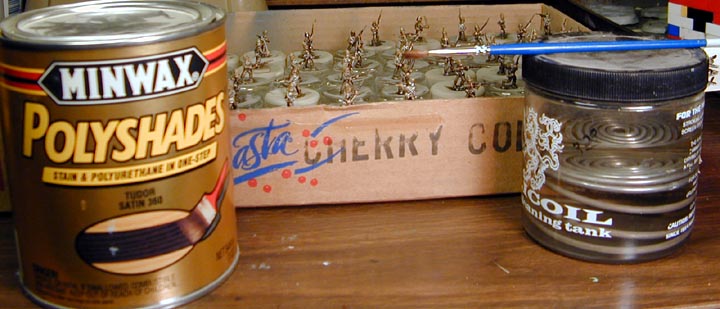
These are the basic tools. Minwax Polyshades polyurethane Tudor satin stain, a cheep brush, a jar of mineral spirits
and the hard part, a tray of painted figures.
One simply brushes on a layer of the stain over then entire surface of the figure and set it aside.
The stain itself does the work. The only intervention is to remove any large pools of stain, if they
form. The mineral spirits can be use to thin the stain to lighten excessive strain from areas that
are desired to be left less shaded and then to clean the brush. Pools can be lifted away with the
brush or the corner of a paper towel. Most often, simply let the figure stand there and the
effect will be quite pleasing.
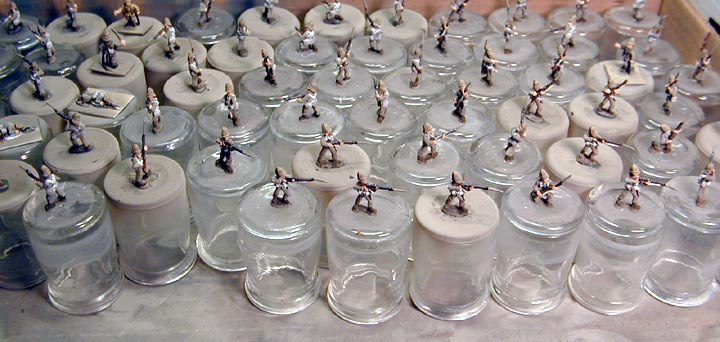
Here is my tray of figures. I like to glue each figure on the bottom of an old jar so that
I don't have to handle the figures while wet with paint or stain.
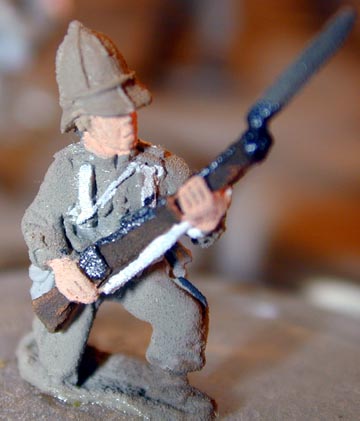
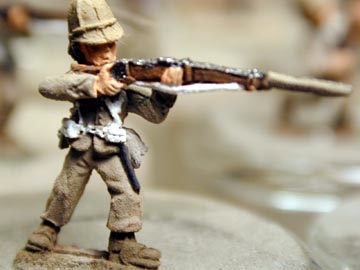
Here we see a close-up of a figure with a very basic paint job. And here is the same figure after "sloping" on the stain.
On close observation one can see the "tooth" of the matte paint used to paint the figures.
The small gains or bumps that cover even the smooth parts of the sculpture.
This can add a small complication to the "Dipping" method of shading. The stain will tend to be
retained by the tooth of matte paint and darken the figure. To avoid this, one can paint with gloss paint,
but as most hobby paints are matte finish, this can be a problem. A more practical
solution is to seal the figure with a gloss coat before using the dip shading method.
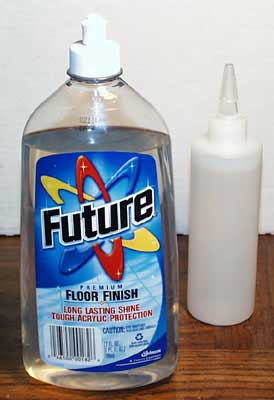
Spray gloss finish can be used, but even more convenient is to coat the figure
with Future acrylic floor finish. This product will be discussed at more length below.
It is basically an acrylic polymer that dries with a gloss finish. It will effectively fill in
the matte finish reducing the tooth and allow the dip stain to flow more readily.
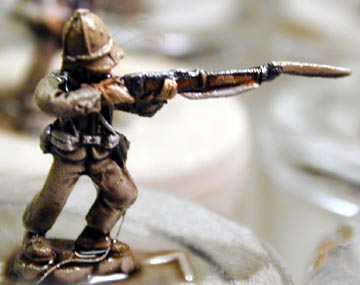
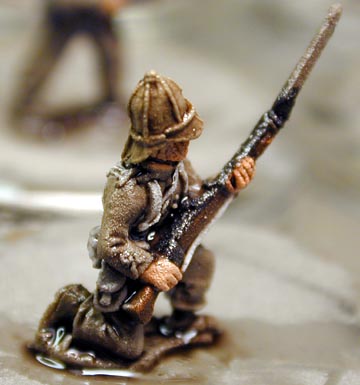
Here we see a close-up of another figure with a very basic paint job. And here is a similar figure after stain.
You can see how this effect seems to bring out all the colors and covers up enough to let your imagination do the
rest. The figures above were photographed while the stain was still wet. The stain will shrink to fit
the surface of the figure as it cures. Look at the figures on the VSF Battles
page. Many of these have been treated with the Miracle Dip.
I was very skeptical about this dipping method at first, but now I love the effect. I have even grown to love the candy coat shine over time. I use to be a dead flat paint kind a guy, and one could go back a spray on a layer of Dull-Coat to reduce the gloss effect. After mounting the figures on bases and adding some grass flock, I do give them a quick spray to cut the shine just a little. Beyond the shading effect, the dip also will provide a very strong protective coat over your paint job.
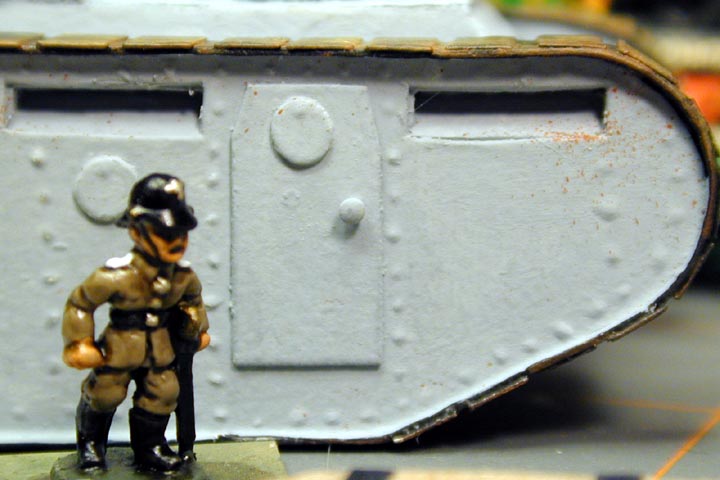
Here you can see how the technique brings out the details like buttons and metals
on a figure, while adding shading to folds in the uniform. Also, despite the focus,
you can see the contrast of the dead matte paint of side of the landship and the
gloss of the figure. To my eyes, it makes the figure look more animated.
To read more about this technique you can go to DBA painting guide or to Scott Holder's original article on Dipping.
There appears to be a commercial product marketed directly to miniatures painters that work on the same principles as the dipping method described above. Called Fanatic Army Painter the site provides some very nice photos of the results of using the product.
I have been involved in several conversation about this technique on The Miniatures Page
and some of the news groups I read:
Space 1889,
GASLIGHT Rules,
Colonial Wars,
15mm Painter,
15mm Miniatures.
The focus of these discussions has been on using the water based Future acrylic floor finish as an alternative to the solvent based Minwax stain. Future has been use by many painters as a convenient and inexpensive acrylic media. It mixes freely with most brands of water based hobby paints on the market. Its usefulness in modeling is far greater then its humble origins might suggest. For even more uses look over The Complete Future . Beyond acting as a solvent, it is used to seal finished works much like more expensive varnishes. It can also be used to create an effect very similar to the "Miracle Dip" discussed above. It and the Minwax technique are now known by various names, such as; Miracle Dip, Magic Dip, Miracle Wash and Magic Wash. The heart of the technique is to dissolve as small quantity of dark paint or ink into the Future. And proceeding in the same way as you would with the Minwax. Either dipping and spinning the figure to through off the extra wash, or brushing on. One needs only water to clean the brush or to thin the wash on areas where it may have gone on to darkly. One can still use a dry brush to wick away pools of extra wash. But the smell and mess of the solvent product is gone. As most painters these days use water based paints, this approach will be very familiar. Some folks suggest diluting the Future with water as much as four parts water to one part Future. I find that simply adding a very small amount of pigment to pure Future works better. But as the cost is so low and there is no particular mess or odor with Future, one can experiment quite freely with various mixes. One problem that sometimes arises is the "muddying" or dulling of the colors of the figures or models. One way to minimize this dulling is to give the object a gloss finish over all the paint, but before the Magic Wash. The reason to put a gloss finish on before the wash is to prevent the grain of a matte finish from "wicking" the wash. The pigment of the wash can get trapped in the rough surface of a matte paint job and result in an overall dulling of color with little shading effect. With a gloss finish, the pigment in the wash will "slip" off the high point and collect in folds were it will give you the shading wanted. One can then add whatever level of gloss or matte one likes after the wash has dried. If you paint in gloss, you should be fine without a separate gloss coat before the wash. I work with mostly dull colors. So some extra dulling does not cause me problems too often. I do go back and repaint on top of the wash from time to time to bring some things out. One can dry brush after a wash as well, but a matte spray (Dull Coat) in a good idea to give some tooth for the dry brushing to catch on. I sometimes also paint in lighter or brighter colors to compensate for the toning down in color with dipping.
You can go to Model Battle Gallery Page. to see other projects I am working on.
Or if you would like to see figures grouped and mounted on bases.
You can go to my VSF Battles page
It has been pointed out to me that the name "Magic Dip" is a trade mark for a product used to create a marbleizing effect on craft items. If you are interested in this product go to Magic Dip page to check it out.
I hope to be able to add more latter.
Thank you for looking:
DyeHard
To head to my Home go to DyeHard's Home Page.
To head back to My Figure Painting.
To check out other VSF matters go to My VSF Page.
![]()


|Over All Home
|What's New
|VSF Home
|My Other Hobbies|
|E-mail|

This work is licensed under a Creative Commons License.