![]()
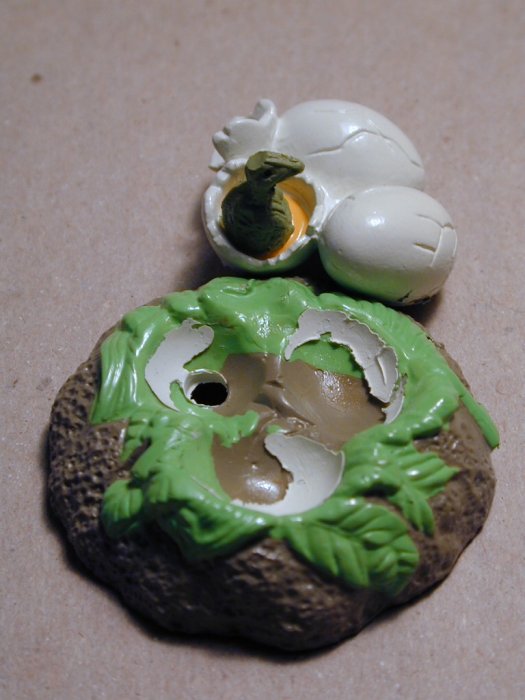
One such items was this dinosaur nest. Left-over from a toy dinosaur I bought mostly for
the cheep toy palm tree.
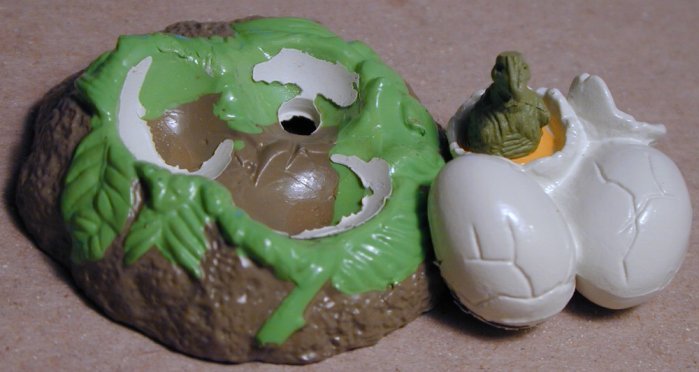
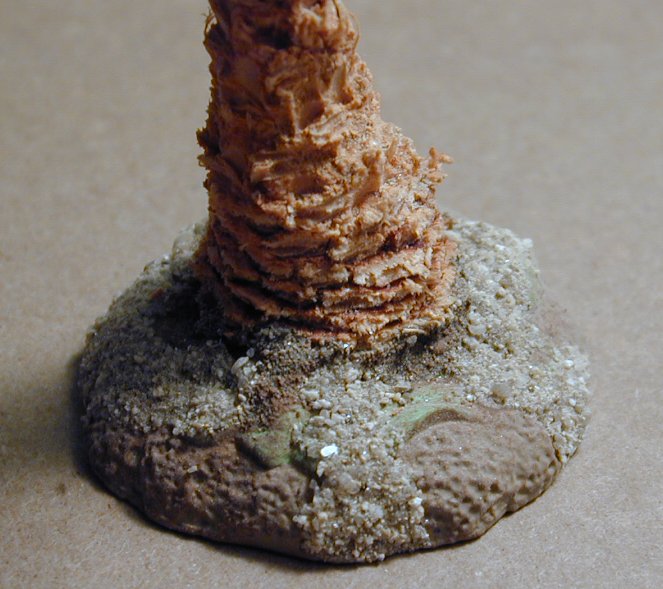
The nest is made of a thick peice of heavy rubber. With some effort I was able to work
a screwdriver under the eggs and pry them out. I figured I could use the base for some
type of terrain. The left-over eggs and baby dino would have to wait for another project.
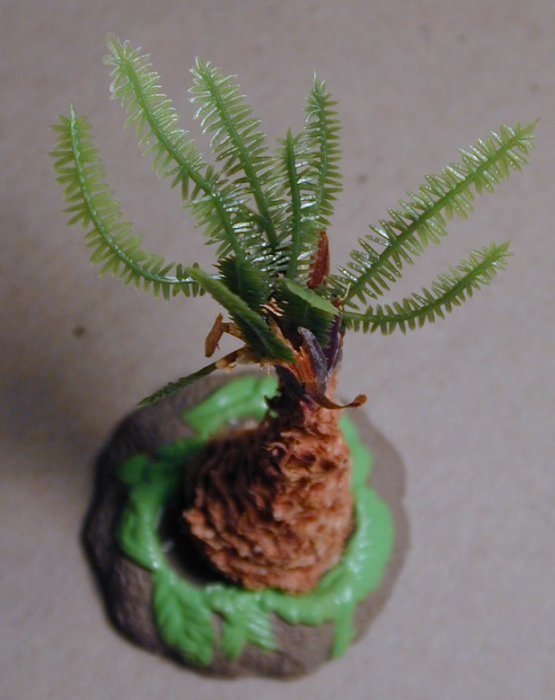
I glued a left over "pine cob" tree as seen in Jungle Tree I
on to the rubber base
using hot-melt glue, while bonding these two very different materials very well
and quickly, this method did leave a mess of very fine threads of glue. I had to resort to a tweezers
to remove them.
To fill the voids beneath the pine cob trunk, I injected some running white glue (PVA)
and packed it with fine wind blown sand. I then dulled the
very bright and glossy green of the painted fronds of the nest by dry brushing on some
brown acrylic paint.
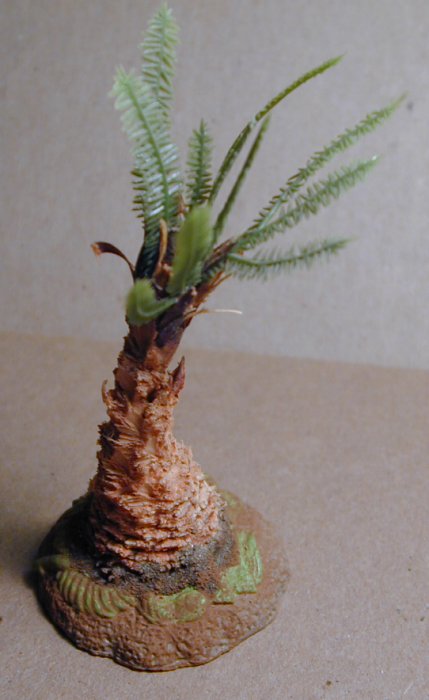
To build up a more convincing jungle floor texture, I start once again with some random
patches of builder's sand.

To simulate the decomposing plant matter that covers the jungle floor, I add some random
patches of used coffee grounds.
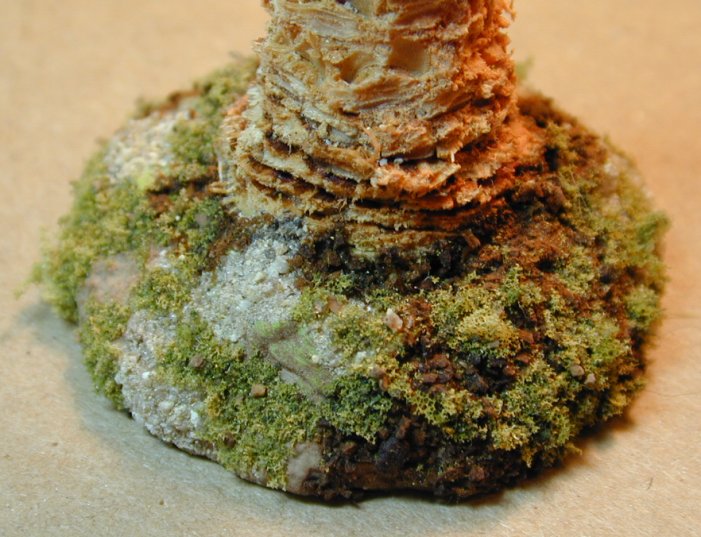
I finished the base with a covering of flocking as living plants.
I was rather pleased with the result. The weight of the rubber base and the relative low center
of gravity of the pine cob made the model tree quite stable, while taking up less space and weighing much less over
all then the jungle tree based on the large washer.
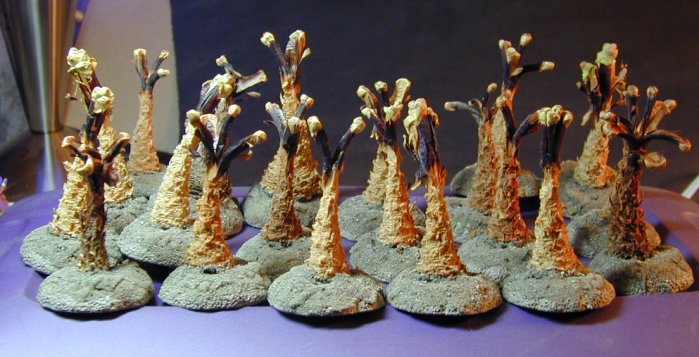
Satisfied with the basic look, it is time for mass production and variation on the theme.
I had plenty of little dino nests to use for bases, and the limit of pine cobs is hard to reach.
To speed thing up, this time I use a hot melt glue. And then begin the process laid out above
or in the Jungle Mound . But to give life more variety, I have
decided to use cheep plastic aquarium plants as the foliage.

By buying the largest plants one can get quite a pile of foliage for little cost.

I routinely go about ripping the plants into their component parts. In this case each
yields five distinct parts: the foliage cap, the foliage collar, the foliage body, the root and
a clear plastic cup shaped base. The body will provide what we need for this project.
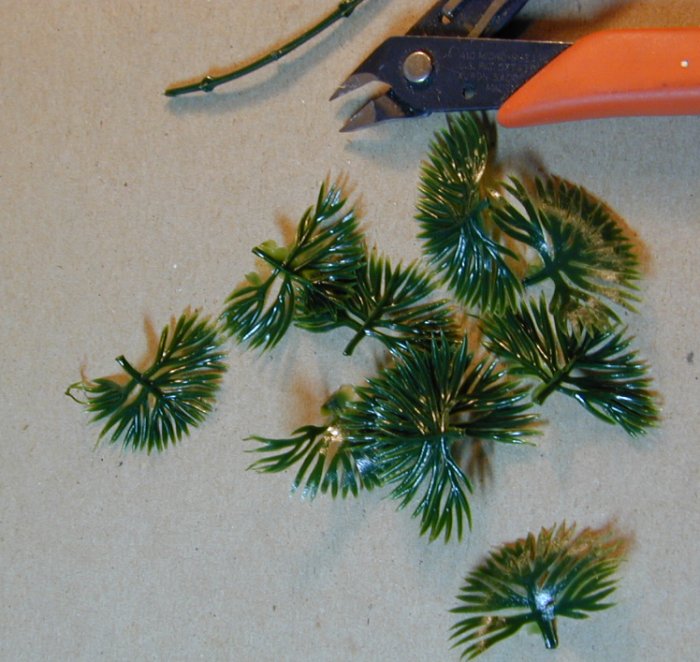
The small plastic fronds are cut free of the central running stem. This can be done with
a scissors, small clippers or even ripped free.

These cheep plants often come with a great deal of flash. This is due to using the molds to make
more product then their were designed for. Warpage and ware result in the injected plastic leaking
beyond the mold's seal. This can be cut away.

A faster way comes from a discussion group about plastic army men. One can use heat to force the
flash to retreat. They suggest heating the free end of an unfolded paperclip with a cigarette
lighter. Here I use a probe (a strong needle in a wooden handle) and a candle for the same effect.
Even more effective in this case, was to wave the plastic fronds over the flame. This sometimes distorted
the shape of the fronds, but that is just and added benefit. But care most be taken not to light
the plastic, or anything else on fire. Also avoid burning yourself.
One cleaned up, the fronds can be glued to the splintered scales of the pine cob as was done in jungle tree or above using tacky glue (PVA).
.JPG)
One finial note about mass production: it is good to have trays and lots of extra scatter materials
so that you can take full advantage of the time savings. The trays can be set aside while the adhesive
dries and to help in the recovery of unused scatter materials .
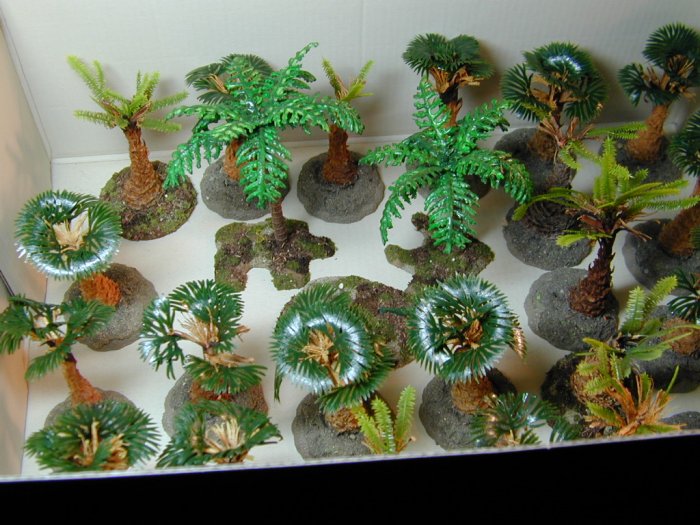
It can take a lot of trees to make a jungle.
While mass production of trees and plants might not be as fun as working on one item at a time, it does help reduce the time needed for each terrain item. Much like painting a unit of figures at a time, speeds up army production.
To see these terrain items in action go to the the Battles Gallery .
You may click on the following to return to the Master Terrain page.
You may click on the following to return to the Victorian Science Fiction page.
I hope to be able to add more latter.
Thank you for looking:
DyeHard
![]()
To head to my Home go to DyeHard's Home Page.


|Home
|What's New
|VSF
|My Figure Painting|
|LINKA
|Models
|E-mail|

This work is licensed under a Creative Commons License.