![]()

.JPG)
To jump start this, I am using some small terrain bases that I put together some time ago.
The pet hairs were removed from the base before the following steps.
.JPG)
This is basically two layers of corrugated cardboard glued together so that the corrugations
run perpendicular. The sides were filler with some light weight wall patch filler. This was
then all given a couple of cotes of brown paint. The upper surface was covered with PVA
and then a flocking mix was poured over it.
.JPG)
The impotent starting materials are fonds from a plastic fern. There can be had at craft stores
of stores which see silk flower supples. Another place to look would be pet stores which sell
supples for reptiles.
.JPG)
As these fronds were not intended to be a miniature, they are very flat. To give them a more
three dimensional form, I decided to reshape them. This is done by dipping the fronds into hot
water and holding them in the desired form until they cool.
.JPG)
The water is heated and held just below boiling. Some care needs to be taken not to burn oneself.
The part only needs to be submerged for a few seconds. As the parts are both thin and made of
a rather soft plastic, it become formable quite quickly.
.JPG)
Although very easy to form, I found that it was difficult to hold all the sub-fronds in the
shape I wanted at once. Trying to reheat any part caused the whole frond to relax back to
its original form. My solution as to form a few sub-fronds at a time and then cut them off,
then proceeding to the next forming.
.JPG)
Working from part to part, I try and give each a gentle curve.
.JPG)
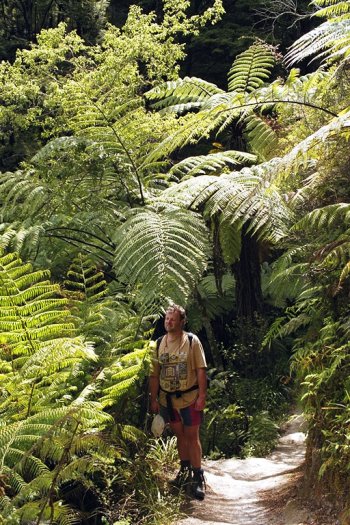
In the end this was a lot of work with out too much pay off. And I could not help but notice that
the reference photos I could find did not show fronds with the curve that I am familiar with
in the ferns from my youth. Those New Zealand ferns must be made of stronger stuff.
My conclusion is that the forming of the fronds is not worth the effort it requires.
I will experiment with other approaches in forming the fronds later.
.JPG)
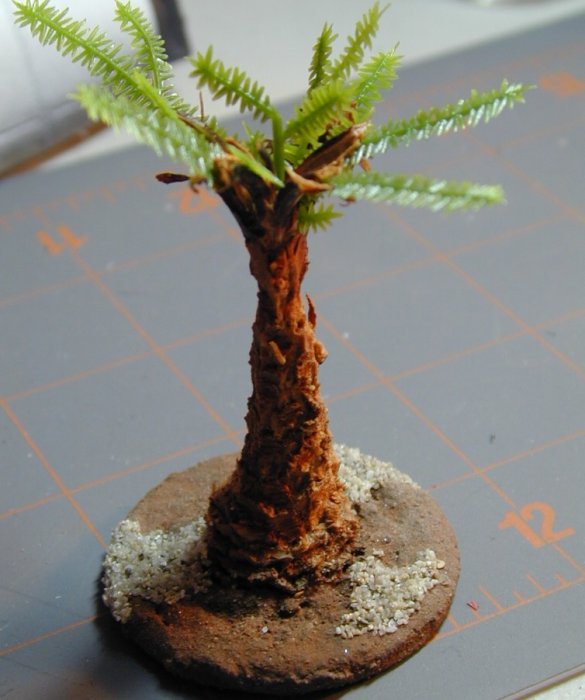
To create the fern treelets, I combined several sub fronds around a central trunk.
In this case a small brad. They are secured with tacky PVA and thread in fly-trying style.
.JPG)
This would represent the largest fern that I have even seen in person.
But as the photographic evidence indicates that this is only the starting point for the
ferns we are modeling, we will need some taller trunks.
.JPG)
The diameter of the handle of this discount brand of cotton swab look right. They are made
of a tightly wound paper, like a lolly stick, so they are easily cut and bent.
.JPG)
Once again using the fly-tying method, the fronds are secured to the trunks.
.JPG)
Once the glue has dried, the trunks and thread is given a cote of dark green paint.
.JPG)
Now we have all the component to assemble of stand of ferns.
.JPG)
The beauty of the corrugated cardboard base it that one can easily pock holes into it
to mount plants. A quick push of the probe and a drop of tacky PVA and we are ready to plant.
.JPG)
I start with the largest ferns and work toward the smaller. First planting the cotton swab
trunked ferns. To save work, I will not be planting any small fern near the base of the trunks of the largest
ferns (those with the cotton swab trunks). Rather, I will create an illusion of greater depth
by darkening the ground under these larger ferns.
.JPG)
The darkening is achieved by adding a additional layer of flock, in this case
Tea . This time instead of my normal blend of teas I have used
to represent the duff of the jungle floor as in the other jungle bases ,
Here I use the tea from a single bag of green tea. This is like the decaying fallen fronds of
the ferns.
.JPG)
To secure the tea I use a mix of matte media and water with a few drops
of liquid detergent to act as a wetting agent.
.JPG)
We could simply use a cheep brush to apply the media mix, but I find a dropper works a little
better, as it does not disturb the existing flock.
.JPG)
With a small pool of the media at the base of the trunks the tea is
sprinkled from above. The tea adds both color and texture to give an enhanced
shadowing effect. The media glue is allowed to dry and then the excess can be removed by
turning the base upside down and tapped. Collect what falls off for later use.
.JPG)
Now the rest of the smaller ferns can be planted. Again by poking a small hole into the base
and inserting the stem of the ferns with a drop of glue.
.JPG)
.JPG)
.JPG)
Several views of the fern stand. An Old Glory 15mm figure and a Frontier 25mm figure to
help give some sense of scale.
To see these terrain items in action go to the the Battles Gallery .
You may click on the following to return to the Master Terrain page.
You may click on the following to return to the Victorian Science Fiction page.
I hope to be able to add more latter.
Thank you for looking:
DyeHard
![]()
To head to my Home go to DyeHard's Home Page.


|Home
|What's New
|VSF
|My Figure Painting|
|LINKA
|Models
|E-mail|

This work is licensed under a Creative Commons License.